Tim Holtz Haunted House Light Up Halloween Book Box Tutorial
Spooky season is just around the corner and it's time to make a fun little vignette using Tim Holtz and Sizzix products!
Hey, crafty friend! I'll admit that I have hoarded Tim Holtz Halloween Idea-ology products for many years now and I really need to use up some of those products! So what better way than to create a vignette, pairing that Idea-ology bits and bobs with some new and rereleased Sizzix Tim Holtz products!
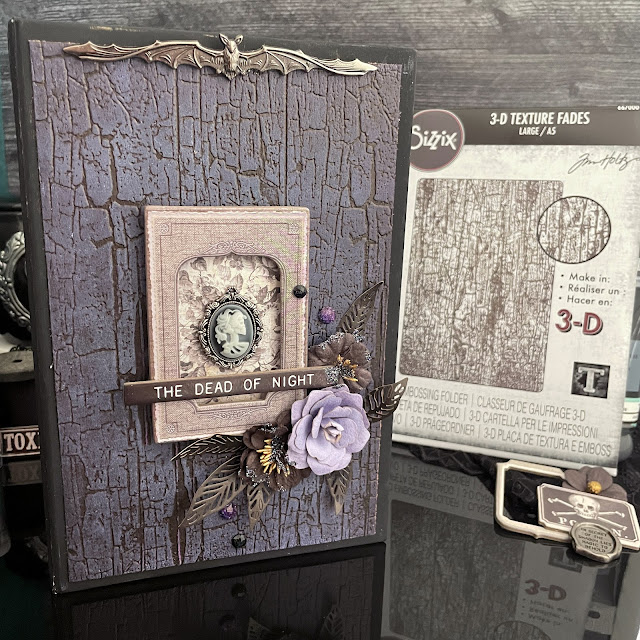
You can now get the Cracked Texture Fade in the new large A5 size! Woohooo!! And several of the fan favorite Halloween dies have been rereleased, like the Haunted House Thinlit!
I paired this die and embossing folder with some other Sizzix Tim Holtz dies and embossing folders, along with a plethora of bits and bobs from my Idea-ology and Prima Halloween stashes. I have included the "new" products and some of the other main products I used (or similar ones) below in my supply list for you so you can shop and make your own little spooky vignette book box.
Though I've given you a shopping list, I do highly recommend using up whatever you have in your stash--it makes you feel so good to use it, trust me! So this tutorial won't go into the specifics of decorating your box, because I want you to truly make it your own. But I will go into the need-to-know tutorial aspects, so let's get into it!
I'm so embarrassed to say that I've had one of the Tim Holtz Configuration Book Boxes for years (and I mean years)! I took all the little moveable boxes out of the book box and I've set those aside for use in other projects as I didn't need them for this project.
Before you alter this book or any paper/chipboard based book box, you want to prime it with gesso first. Paint and sprays have a lot more water in them than gesso does and that can warp your paper or chipboard. Gesso not only provides the perfect grippy surface to paint and spray on, but it will also protect your book box from too much moisture. So start by priming the entire book box. I highly recommend using Finnabiar Gesso (whit, black or clear). I used the clear and included that in my supply list below for you.
Once the gesso is dry, you can paint your box. I painted the entire inside of the book box, as well as all of the edges of the cover and the sides and "binding" of the book box. I used the Sizzix Creamy Acrylic in Black. For the inside, where my sky background is, I mixed the black and a blue paint from Prima to create a midnight sky hue.
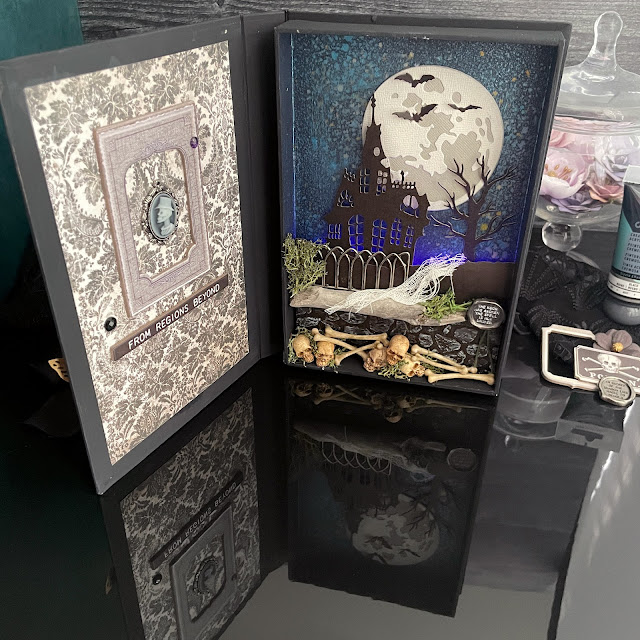
I took some printer paper and folded it to fit inside the box to mask off the area where the ground would be and then used some blue and gold Distress Mica Sprays and Spritzes to create a starry night sky in the blue painted area. Then let this dry or hit it with your heat tool.
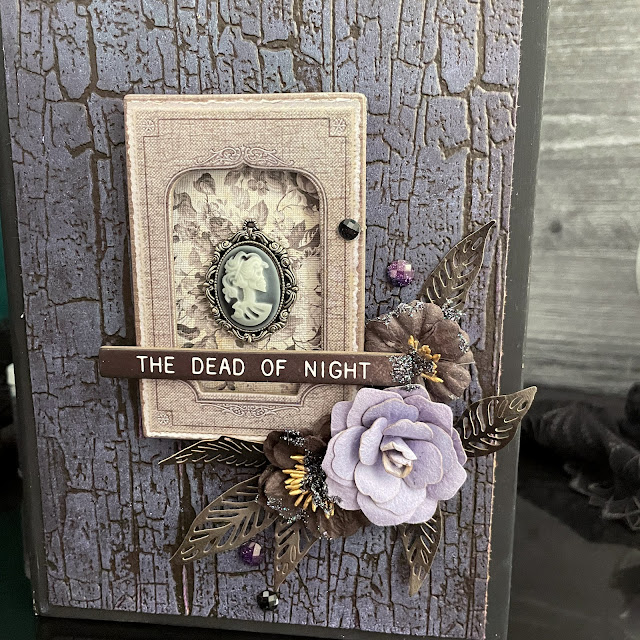
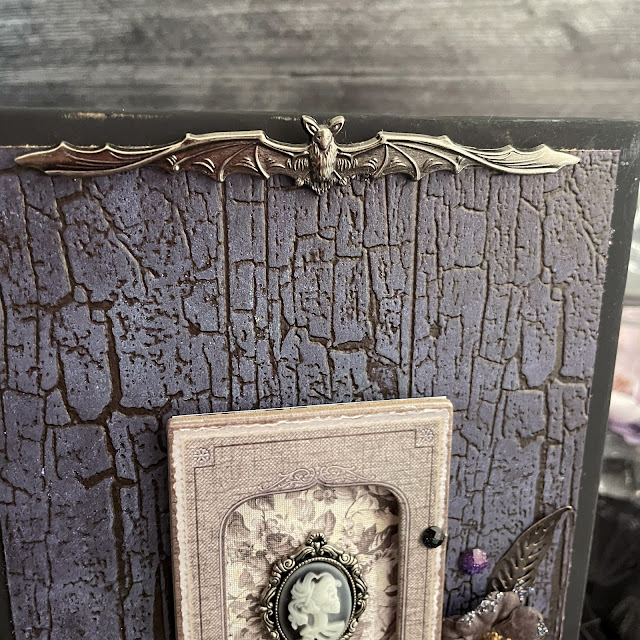
Now let's talk about covering the outside of the book box as you'll want to do that next if you are lighting yours up like I did. Use a heavy weight smooth black cardstock, like Tim's black Kraftstock. Or you can use a black mixed media cardstock or basic heavyweight black cardstock. Mist both sides of the cardstock and then run it through with the Cracked A5 Texture Fade. Do this using 2 sheets of cardstock so you have one for the front of the book and the back of the book.
Use a heat tool to dry your embossed cardstock or set it aside to air dry. Once dry, use a brayer and a Distress Oxide of your choice to cover the highlights of the texture in ink. I used Wilted Violet. To get a really punchy dose of color, ink your brayer up well and add a hefty coat of ink to the embossed cardstock. Mist the ink then dry it with a heat tool. Then add a second layer of ink, mist and dry it.
Once your embossed panels of cardstock are dry, you can add a bit of Soft Matte Gel to the backside and press it onto your book covers. I used the cleaned brayer to help laminate the embossed cardstock to the book, then used a bit of hot glue along the edges to help hold it securely in place while the gel dries.
If you are lighting your book box up with Tiny Lights, drill a hole in the bottom of the inside of the box and string your lights through. I wound my lights around a popsicle stick and eventually hot glued it in place when I started working on assembling the layers of the inside of the box.
I die cut the Haunted House and the bats in that Thinlet set from the same black cardstock as the Cracked panels. I also cut the tree from the Pumpkin House die set from Scrapbook.com. The moon from the Sizzix Tim Holtz Moonlight Thinlit was cut from some gray cardstockstoks and inked with a bit of the Hickory Smoke Distress Ink.
For the ground below the house and to hide the tiny lights, I die cut a panel using the Sizzix Skyline Silhouettes--I chose one of the hilly ground layers. I cut it twice to lengthen the width of the cut, and used a trimmer to cut it to the width of the box. I misted this ground cut and then placed the bottom half of it in the A6 sized Cobblestone Texture Fade. Then I used a brayer to ink up the cobblestones with a brown and grey Distress Oxide.
To glue your moon to the sky, you'll need to re-prime a bit of the sky. I find that most adhesives don't stick well to Distress sprays. I used the clear gesso to prime a circle just smaller than the size of the moon and let it dry. Then I added liquid adhesive to the moon and pressed it into place. I added a few dots of hot glue on the edges to secure it right away.
Then put a tiny bit of foam adhesive on the back of your Haunted House and press it into place. The Scrapbook.com Black Foam adhesive is super sticky and stuck well to the Distress Spray background without any issue.
I unwound the last few lights of the Tiny Lights from the popsicle stick and stuck it under the Haunted house a little, then hot glued the popsicle stick in place. I then added two layers of 3mm thick foam around the wiring and popsicle stick, then pressed the ground layer in place.
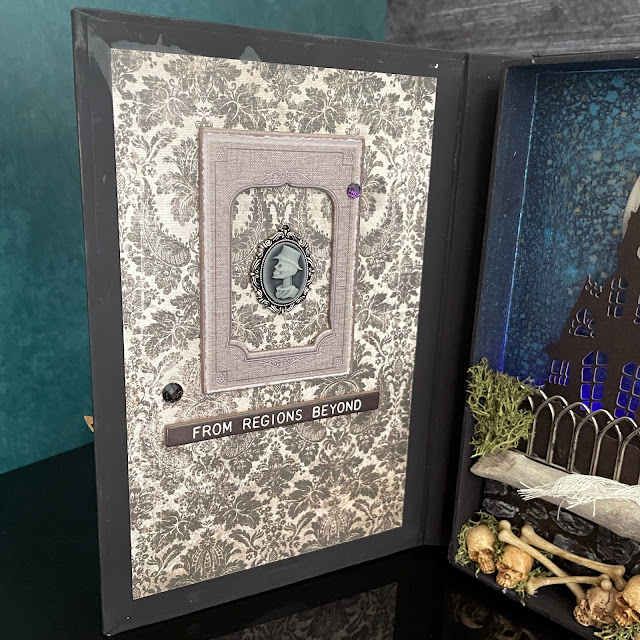
The bats got glued to the moon and then I added a twig, some moss and a bunch of Idea-ology pieces from my stash to fill in my scene and hide the transition between the embossed and non-embossed ground. On the inside of the cover of the book, I used Soft Matte Gel to adhere a piece of Worn Wallpaper. You could use any patterned paper you like for this!
Then I decorated the front cover with more Idea-ology Halloween, some Skeleton Leaves die cuts and Prima flowers and glitter! Then I added a bit of Idea-ology Halloween to the inside cover patterned paper.
On the back, I attached the battery pack with a velcro dot set. Then added a cover of patterned paper/Worn Wallpaper over the batter pack. I scored the paper to shape it around the batter pack, glued the bottom edge to the back of the book, then used another velcro dot set to close the top of the paper battery cover.
I hope this inspires you to create a little spooky scene book box! I can't wait to see what you create--don't forget to tag me on Instagram if you post there so I can "oooh" and "ahhh" over it! I always love to see how my tutorials have inspired you. Until next time, happy crafting!
Adrienne
Shop the Supplies:
Scrapbook.com, A Cherry On Top, Spellbinders, Sizzix, Etsy & Amazon
I am an affiliate with multiple companies. When you shop the links below, I receive a small commission from the affiliate, at no additional cost to you. This helps me balance the costs of the time and love I put into my projects and blog so I can continue to share my ideas with you for FREE. If you shop the links, thank you! I greatly appreciate it.
Below are products that I used for this project.







0 comments
I'd love to hear your thoughts!