DIY Altered Jar Christmas Snow Globe
Let's alter a jar and make a winter wonderland using Prima Marketing's From the North Pole collection and Finnabair Snowflake Paste!
Hi, crafty friend! Prima Marketing challenged the design team to alter a jar in some way using one of the latest Christmas collections.
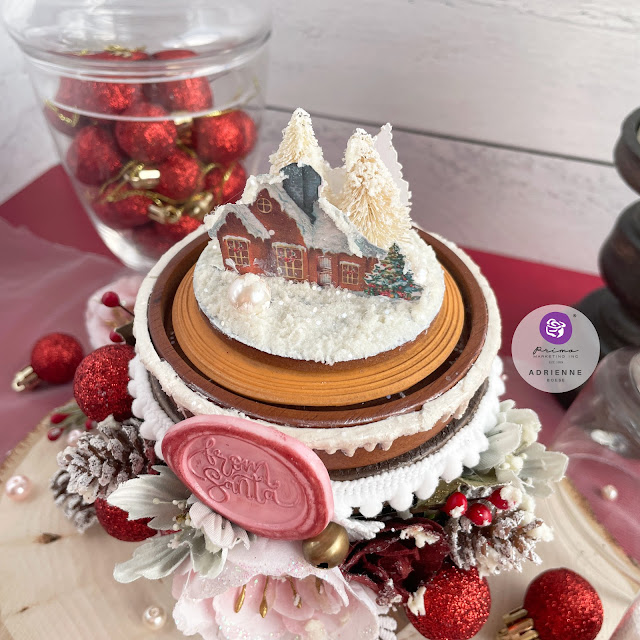
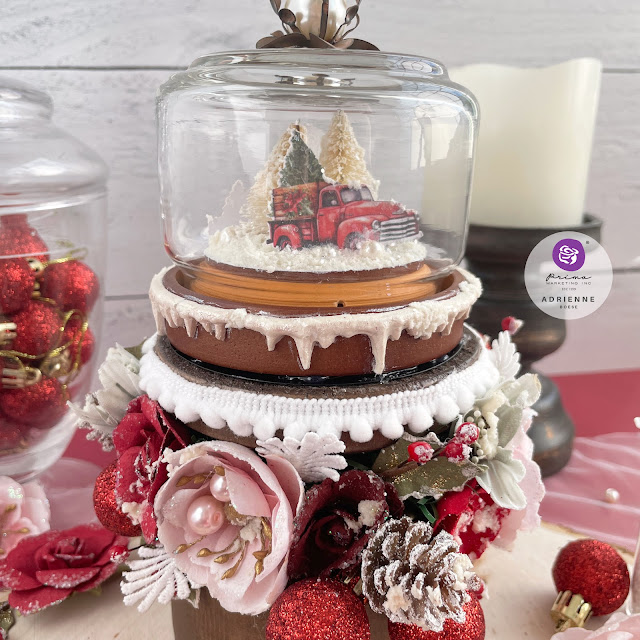
So I made an adorable "snow globe" using From the North Pole ephemera and Finnabair Snowflake Paste. I added this altered jar to the top of a candle pillar holder and of course altered that too with Prima flowers! (You can find a list of most of the supplies I used linked at the bottom of this post!)
So let's get into this tutorial!
I started with the candle pillar holder first. This pillar holder curves in around the center and this was the perfect spot to attach a garland tie.
I used a pair of wire cutters to cut the garland tie to size. Before attaching it, I created 3 little clusters consisting of 2 mini glitter ornaments, 1 mini pinecone ornament and small jingle bell (from the Redesign Chipboard Tags set) by placing them onto some thin wire and twisting it closed. I then twisted this wired cluster of ornaments onto the garland tie and then twisted the garland tie onto the pillar holder.
Next I used hot glue to attach flowers to the garland tie between each of the ornament clusters. I placed one of the pink flowers from the 25 & Peppermint Santa Sweet pack and 2 of the From the North Pole Deck the Halls red roses and the Berry Delight holly sprigs. I also tucked in the From the North Pole/Lost in Wonderland sage green stemmed flowers and some lace from a previous Frank Garcia Christmas collection.
I hot glued some white pom pom trim to the top of the pillar holder. I did a few other things to the bottom, but I saved that for the end, so we'll come back to that in a minute.
I turned this jar upside down for this project, so that the lid would be glued to the top of the pillar holder. But before we get to gluing that in place, I altered the jar and created a little snowy scene first.
I started by using the Redesign Modeling Material and the Candy Cane Lane mould to add icicles to the lid of the jar. I glued on the moulds while still pliable using Finn's Soft Matte Gel and then covered the moulds in a pearly white acrylic paint and the Celestial Wax for an icy look.
On the inside of the lid I created my snowy scene by hot gluing some mini white bottle brush trees, pearls and two pieces of From the North Pole ephemera. I added additional hot glue around the pieces to build up my snowy ground.
Once the hot glue was hardened, I painted it with Finn's Heavy White Gesso. Once that layer was dry, I added Finn's Snowflake Paste, then sprinkled on additional clear glitter for an extra sparkly effect. I added a little bit of this snow paste and glitter to the ephemera and bottlebrush trees as well.
I allowed this scene to dry overnight before popping the jar on the lid. The next day, I added the jar. Redesign's Modeling Material does shrink a bit as it dries, so if you have any spaces between mould castings, or you just want some extra sparkle (or both, like me) cover the gaps with a bit of Snowflake paste and glitter.
To create the finial on top, I used one of Finn's brown Grungy Succulents. I glued it to the jar with a bit of hot glue and Heavy Body Gel. Then I used the same adhesives to glue a large pearl into the center of the succulent.
I finished this project off by adding Snowflake Paste to the flowers and greenery around the pillar holder the popped on some Memory Hardware Pearls. For the final touch, I painted one of the From the North Pole Wax Seal moulds with the Powder Pink Liquid Acrylic Paint from the Sentimental set the highlighted the texture with the Burgundy Wax. I popped this on with a bit of hot glue and added just one more jingle bell next to it!
I hope that this inspires you to alter a jar into a snowy little scene for your winter holidays, and until next time, happy crafting!
Adrienne
Shop the Supplies:
Scrapbook.com, A Cherry On Top, Spellbinders, Sizzix & Amazon
I am an affiliate with multiple companies. When you shop the links below, I receive a small commission from the affiliate, at no additional cost to you. This helps me balance the costs of the time and love I put into my projects and blog so I can continue to share my ideas with you for FREE. If you shop the links, thank you! I greatly appreciate it.
You can also use the code adrienne15 for 15% off your order on the Prima Marketing Retail site.
Below are products that I used for this project.


0 comments
I'd love to hear your thoughts!