Specimen Stamp Mini Mixed Media Panel with Tim Holtz Distress Inks and Oxides
I love fiery oranges. It reminds me of autumn leaves, sunsets and Painted Lady and Monarch butterflies.
When I saw the new Crackling Campfire ink, I instantly fell in love with the fiery orange color. I new it would be perfect for Halloween, autumn and butterfly projects. So as soon as I received the new Specimen stamp, I set to work creating a pretty butterfly mixed media panel that reminded me of the gorgeous Painted Lady butterflies that are so plentiful here in Colorado.
I started by cutting a piece of thick chipboard to 6 x 4 inches. I then cut a piece of mixed media heavystock to fit. It was a half inch short but that was easy to fix with a pretty piece of torn patterned paper in a orange hue. I reached into my stash of scraps and pulled out a piece from Basic Grey's Ambrosia collection. I cut and then tore one edge and set it aside for the time being.
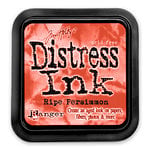
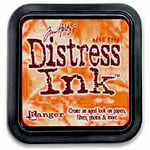
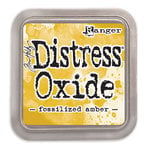
I set about creating a gorgeous inky background on the mixed media heavystock. I mixed both orange and yellow Distress Inks and Distress Oxides. I'd blend on the ink, spritz with water, lift with a paper towel and then dry with the Ranger Heat It tool to set it. I kept adding more and more layers until I was satisfied with the blend and distressy goodness.
Next, I stamped one of the large butterflies twice with a clear embossing ink on Neenah Solar White flat cards and then sprinkled on black embossing powder. I heated both with my Ranger Heat It tool then set about coloring it with several colors of Distress Crayons. I colored directly on the butterflies with the crayons then used a water brush to blend the colors together.
Once the butterflies were dry, I fussy cut both out with my Tim Holtz snips. I gently bent the wings of one butterfly up and then glue the body of it down with Glossy Accents onto the body of the other butterfly.
Using Ranger's Archival Ink in jet black, I inked up portions of the script text from the Entomology stamp set. Using just my fingers, I pressed the script stamp onto different parts of my background. I also inked up the specimen text from the Specimen stamp set and stamped it onto the background as well.
Then, using Distress Collage Medium, I glued down all of my paper elements, starting with gluing the inky background onto the thick chipboard. Then I glued down the torn strip of Ambrosia patterned paper to the strip of chipboard that was left uncovered. I added some more torn papers from the Abandoned paper stash as well.
Finally, I added large foam squares to the back of the layered butterfly then adhered it to my background, stuffing some nests of gold thread under it. I added a couple of orange colored parts and a sentiment from Tim's Small Talk sticker pack with some small foam squares.
Happy Crafting!
Adrienne
I am an affiliate with Scrapbook.com. When you shop the links below, I receive a small commission from the affiliate, at no additional cost to you. This helps me balance the costs of the time and love I put into my projects and blog so I can continue to share my ideas with you for FREE. If you shop the links, thank you! I greatly appreciate it.
Below are products that I used or similar products.












0 comments
I'd love to hear your thoughts!