
Poe's Love Letter DIY Gothic Garland
With the right color palette, you can turn the Vicki Boutin Sizzix holiday collection into a Spooky Season make. And this mini envelope garland is the perfect gothic touch.

Hi, crafty friend! I have a brand new crafty idea for you. Who said Christmas collections only had to be for Christmas? What I love about the Vicki Boutin Sizzix holiday collection is that it is also filled with some great everyday elements, like the First Class Mail envelope and Border Clusters dies.

I combined these with some of the Winter Greenery and Florals in this release, along with some favorite Tim Holtz Halloween Thinlits and a Honeybee die from my stash to create this Edgar Allen Poe gothic inspired garland.

I've got the supply list below, and the only thing I couldn't find online for sale in some form at the time of writing this, was the Tim Holtz Pumpkin Duo Thinlit. But there are so many great pumpkin dies out there I know that is an easy one to switch out with something else.

I also used the original Candlelight Thinlits, but you can get some of those dies in the Winter Candlelight Vault Thinlits set still. But I highly recommend just searching through your stash for spooky dies to pair with the Vicki Boutin collections to make this your own. Perhaps you have another gothic author you love that you want to pay homage to in your version of this garland!

Now, let's get right into this tutorial! Start by die cutting the number of envelopes you want from Sizzix Smooth White Cardstock. Then die cut the insert for the inside of the envelope from 2 colors that are in your choice color palette. My color palette is black, red and red-purple as the main colors with splashes of white and silver/gray. I used a black cardstock and a pearlescent red cardstock for this insert. Also die cut the strings wrap Thinlit from one of your secondary colors and the label and label layer from a primary color in your palette and white.
Mist the insert pieces and stick them into a 3D embossing folder and run it through your die cut machine. I used the Entangled Large Texture Fade, and if you use a larger 3D embossing folder such as this, I recommend using a die cut machine with an 8" width opening--it will make it so much easier. So while I used my Sizzix Big Shot for everything else, I did pull out my Sizzix Big Shot Switch Plus for this.

Because I wanted this red to be a little less ruby colored and a little more gothic, I used Distress Ink in Black Soot to go over the entire red colored envelope insert. I used a domed foam ink blender attached the blending head of my Sizzix Multi-Tool to apply it. If you place your die cut on a sticky surface, like the Scrapbook.com GripMate, it will make blending ink easier as it holds the die in place while you work.

Fold and glue each envelope into place using Sizzix Express Glue. Then add the same glue to the back of the insert and glue it in place.

Die cut a Spider Web for each envelope from Vellum. I recommend using the Sizzix Chrome Precision Base Plate for this and any other intricate dies (like the doily and lace from the Border Clusters).

Die cut a Border Cluster for each envelope using your color palette and a half doily cut for the inside of each envelope. Tear both ends of the lace strip for a more distressed look. Then ink the edges of your die cuts in Black Soot. And when I used the red pearlescent paper, I fully inked it up with the Distress Ink in Black Soot.

Glue the half doily die cut to the inside of the envelope. Using a hole punch, like the We R Makers Crop-o-dile or the circle punch on your Sizzix Scoring Board and Trimmer, create a hole on either side of the envelope for the garland string. I placed mine just below the fold of the top part of the envelope.

Glue the Spider Web to the envelope, just offset from the center. Then glue your Border Cluster together with Express Glue and foam adhesive. Add the strings wrap die cut from the First Class Mail Thinlits to this cluster and attach this to your envelope with foam adhesive. (I used Express Glue for everything, but the circle piece from the Border cluster, when got added on with foam adhesive.)

Die cut out some of the Winter Florals and Winter Greenery, including the bow, from your color palette. Ink your die cuts if desired for a distressed and darker appearance. Glue the layers of your flower together, then shape with the shaping kit.

Also die cut out the spooky icons you want for each envelope. I only photographed 5 of the 9 envelopes I created, but I made 3 ravens, 2 sets of candlesticks, 2 pumpkins and 2 lanterns. I used Express Glue to glue all of the layers together, but for the Honeybee Crow, I left the tail layer unglued and then used some foam on the tip of the wing to give my "raven" more dimension.

Add the icon and the florals and greenery to your envelope. I added some inside, and some on the spooky icon die cut with the bow on top. Add a Small Talk Sticker to the label, after gluing the two layers together. Then pop this in the mix. I cut off the little circle piece to help me place it just right under some of the boarder cluster.

Glue some pearls onto the envelope and to the center of the flower. I used Pinkfresh Metallic Silver Pearls. Then add some clear glue to the edges of the florals and greens, and to bits of your spooky icons. Sprinkle on a German Glass Glitter and tap off the excess.

Then string all of your envelopes onto your twine or ribbon. I used a tapestry needle to help me string the envelopes onto some thin black velvet ribbon. And your garland is ready for hanging! Until next time, happy Spooky Season crafting!
Goth Adrienne
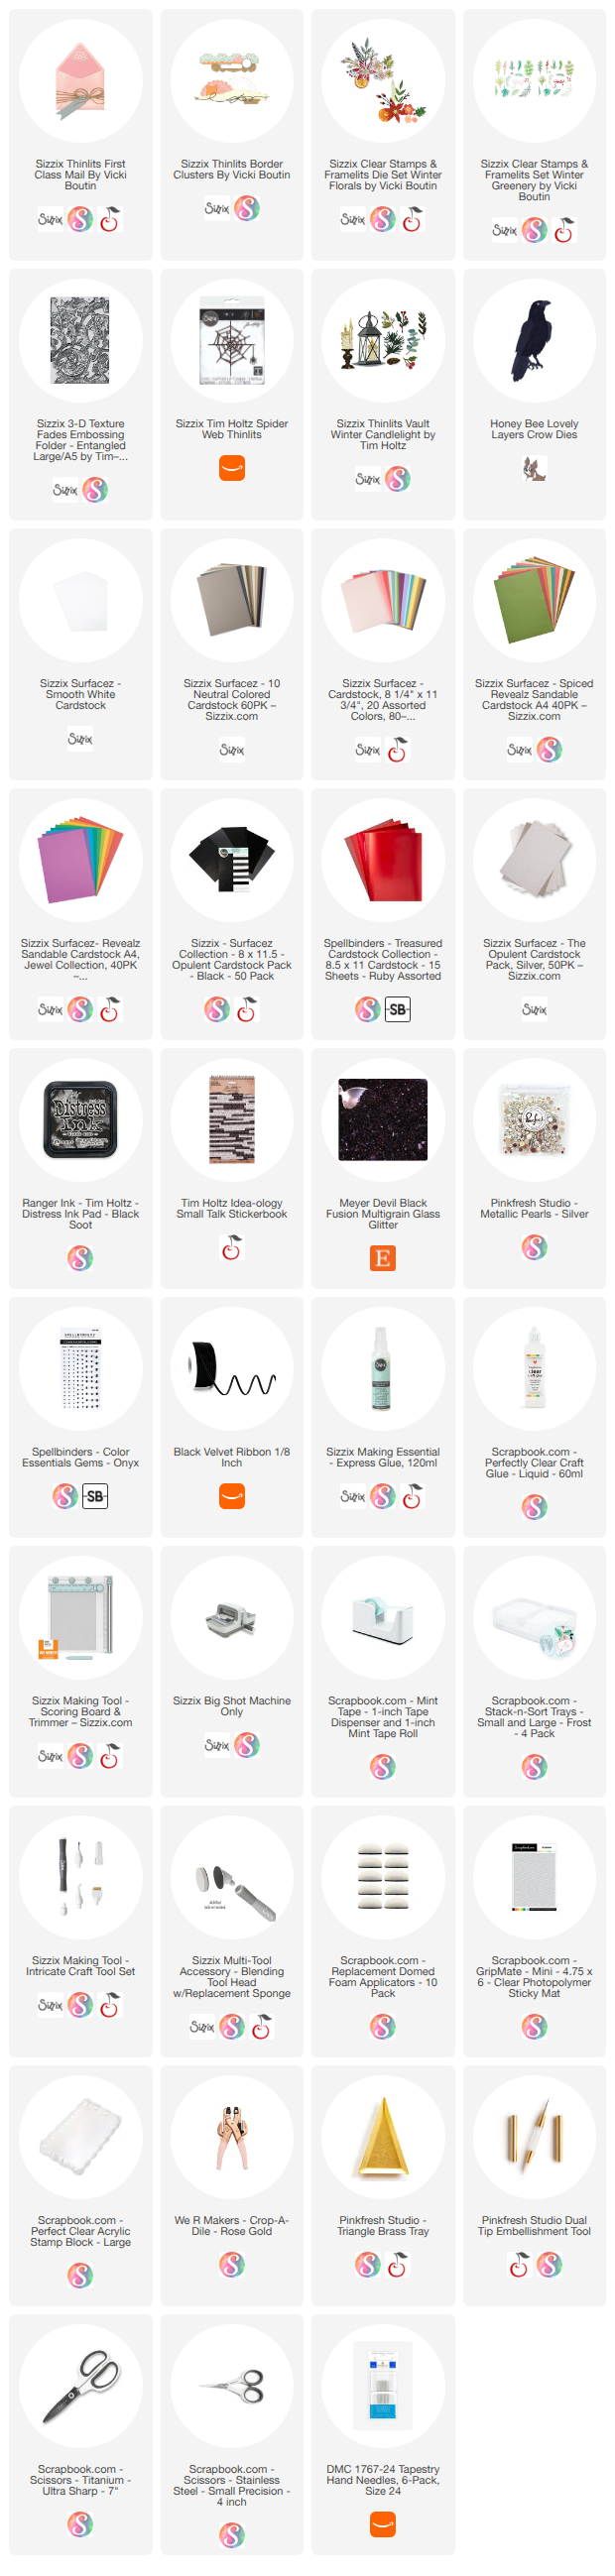
Shop the Supplies:
Scrapbook.com, A Cherry On Top, Sizzix, Prima Marketing, Spellbinders, Scrap Diva Designs, Etsy & Amazon
I am an affiliate/associate with multiple companies. When you shop the links below, I receive a small commission from the affiliate on qualifying purchases, at no additional cost to you. This helps me balance the costs of the time and love I put into my projects and blog so I can continue to share my ideas with you for FREE. If you shop the links, thank you! I greatly appreciate it.
Below are products that I used for this project.


0 comments
I'd love to hear your thoughts!