 |
| Sample of the Prima mermaid doll stamp designed by Julie Nutting, courtesy of Prima Marketing. |
Once it's dry enough that the pieces no longer shift when gently nudged, I begin decorating the outside cover. In the meantime, I start with cutting out all of my die cuts--the seahorse, seaweed, lily flowers and coral. I also used my paper trimmer to cut the mats for the photos.
 |
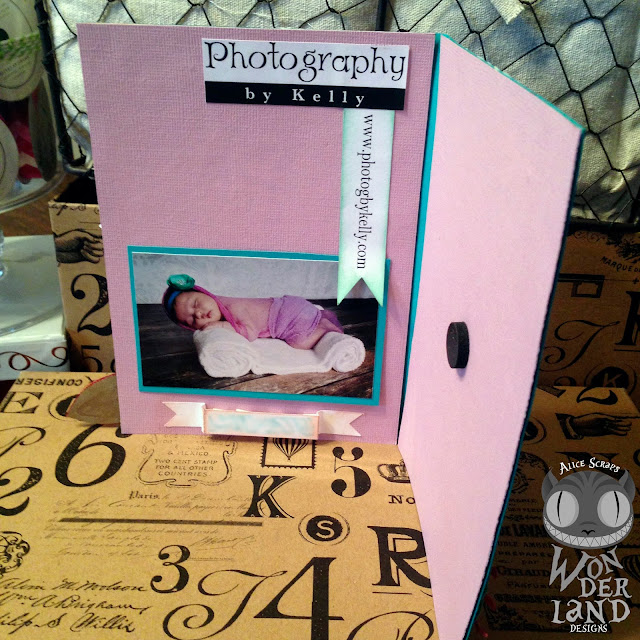
| The back of the custom disc case. Photos of infant courtesy of Photography by Kelly. |
I also cut the seahorse from the pale green paper but covered him in Prima's Art Extravagance white sand paste, then set him aside to dry. I used the same medium on the coral, which was cut from a deep coral colored cardstock.
 |
| Photos of infant courtesy of Photography by Kelly. |
 |
| Tiny flowers spritzed with distress markers add a bit of whimsy to the disc case. Photos of infant courtesy of Photography by Kelly. |
After the base of the custom disc case was dry enough, I used a Prima stencil and Prima's Art Basics modeling paste in opaque to add a few "scales" or "waves" to the outside base of the case. I set this aside to dry for a short period of time.
 |
| A touch of glitter to the headband and a starfish add girlies to the hair.. Photos of infant courtesy of Photography by Kelly. |
When all my other pieces were dry, I used green distress inks and my blending tool to add color to the crackle effect on the green seaweed. I also added green and brown distress inks to the edges of the seahorse then used my airbrush tool and distress markers to add shots of color to the center portions of the seahorse. Then I added a coral colored distress spray to the pieces of coral as well as some melon colored gelato from Faber Castell.
 |
| Red tulle adds texture and a scale-like effect to the mermaid's tail. Photos of infant courtesy of Photography by Kelly. |
I also used my Silhouette sketch pens to write out the name of the baby and date of birth then cut them out on two banners. Then inked the two baby banners as well as the two url banners with matching inks.
Once the modeling paste stencil was dry on the base of the case, I began layering on all the photos and die cuts to the inside and outside of the case. I also adhere the foam mounting circle for the disc to the inside of the case as well as my logo sticker and url banner and my cousin's logo sticker and url banner. Before adding the lotus flowers and Queen & Co. dots, I applied clear gesso to the bottom of the case then added a multi-hued bronze mix of micro beads to create the effect of sand at the bottom of the ocean. I set this aside to dry. Once dry, I added the lily flowers and droplets.
 |
| Photos of infant courtesy of Photography by Kelly. |
- Bazzill: Cardstock - classic red, candy necklace, white
- Core'dinations: Tim Holtz Distress Collection - milled lavender; Essentials Color Core Cardstock - begonia
- Scrapbook.com: Chipboard - thin
- Basic Grey: Konnichiwa - koi pond
- My Mind's Eye: Stella & Rose "Gertie" - delightful
- Recollections: Cardstock - sea green, kraft; Microbeads - antique copper
- Silhouette America: Sketch Pens - red, teal; Sticker Pape - white
- Faber Castell: Gelatos - metallic mellon
- McGill: Flower Shaping Tools and Foam Mat
- Ranger Ink: Glossy Accents; Archival Ink - jet black
- Tim Holtz: Distress Crackle Paint - rock candy; Distress Glitter - rock candy; Distress Spray - abandoned coral; Distress Marker - picket fence, victorian velvet, peacock feathers; Distress Ink - fired brick, tattered rose, cracked pistachio, pumice stone; Airbrush Tool; Idea-ology - kraft glassine
- Queen & Co.: Droplets - clear
- Doodlebug: Mini Pearls - lily white, bumblebee, beetle black, lady bug
- Golden: Gel Medium - heavy gloss (adhesive)
- Prima: Finnabar Stencil - 12x12 scales; Art Basics - modeling paste opaque; Art Extravagance - texture paste white sand; Julie Nutting Mixed Media Doll Stamp - Sea Sallie, Ledger 3 - 12x12 patterned paper
- Other: red tulle; black foam disc mount circle
 |
| Photos of infant courtesy of Photography by Kelly. |
If you wish to purchase the mermaid doll stamp, there are still a few places on line you kind find it for sale, such as Amazon, Flying Unicorn, Photo Bella and even directly from Prima!
Thanks so much for sticking with me through that long post! I hope you enjoyed it as much as I did. Now for your freebie! I created the water lily flower cut file myself. There were some cut files in the Silhouette store, but they didn't have the right number of petals. And for those of you who read my blog often will know I'm a stickler for the correct number of petals on my flowers (I'm an avid gardner as well)! Click the image below to download your free cut file!
>>Click Image Below to Download the Free Cut File<<
Happy Crafting!
Adrienne


0 comments
I'd love to hear your thoughts!