Shades of pink and mauve wash over this dreamy canvas to create a floral explosion.
I think mixed media and paper flowers are my one true love in crafting. Don't get me wrong, I started out with just scrapbooking and it will always be my first love. But mixed media allows me to add on
all the flowers! And I adore paper flowers!
Okay, so I love more than just paper flowers--there's
butterflies,
lace, and
glitter glass too! Which I of course added all of those elements into this pretty in pink canvas! And speaking of pink, as a little girl, it was my favorite color.
Back in the day it was sort of expected that most little girls loved the color pink. And if I'm being completely honest, what I wouldn't have told you back then is that I always had a
soft spot for teal and aqua. I love all the colors now and there is something so delicate and dreamy about shades of pink.
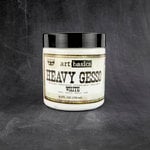
But I digress. Let's jump into this tutorial so you can see how I build up my layers! I started by priming my canvas with
white gesso. It was already primed, but the the primer I have is a brighter white and it gives me an opportunity to add in texture with my palette knife.
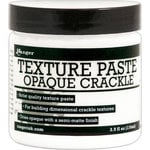
Then I used my
opaque crackle texture paste from Ranger to add even more texture. You can use a heat tool to help this dry, but I prefer to let it air dry.
While my canvas was drying, I chose one of the Sharon Ziv tree branch moulds from my collection of resin casts and also painted it with white gesso.
Once everything was dry, I glued the branch down onto the canvas using
heavy body gel. I chose this particular branch because it was the largest of the branches and would serve as a good anchor for the rest of the elements.
So I transferred them onto some vellum and then fussy cut them out with a
good pair of sharp, small scissors. When I fussy cut the elements, there was no need to be super perfect because the vellum creates a semi-transparent look. So no need to pull out your craft knife!
Using heavy body gel, I glued down my first layer of transfers and
paper flowers. I like to create a diagonal pattern for many of my canvases and use the bigger flowers toward the center and the smaller flowers toward the corners.
I like to use ephemera like this in-between layers of paper flowers to add stability for the next layer of flowers. Plus, it looks super cute poking out between the layers!
I then glued on some
smaller flowers on top of the ephemera piece using more heavy body gel. I chose one that is taller (the darker one) and one that is shorter.
This shorter flower will be the base for the centerpiece of this canvas--a gorgeous Reneabouquets butterfly.
I like to use
heavy body gel because it has a long work time, meaning you can go back and pull up your elements without worrying about things tearing off.
I decided I wanted to add a little bit of
this rose gold lace in spots on the canvas so I pulled up a couple of flowers so I could tuck the lace underneath.
I wanted to tuck a few
beaded berries and
buds into my canvas as well and did that next. I hid the stems on the berries and then bent the stem on the bud back up and twirled it around something round to give it some shape.
Now that all of the layers of
flowers and fussy cut elements are on, it's time to add color to the canvas background with some
pink impasto paint.
I always save a few pieces of plastic packaging to squeeze a bit of paint onto as this makes for an easy cleanup. I
spritzed a little water onto the paint and mixed it around. Working in sections, I then applied the paint to my canvas, spritzed it with more water and let it drip.
To add a bit more dimension in color on the canvas, I splattered a bit of rose gold ink.
I squeezed a small amount of the
rose gold ink from a reinker into a dish and added a small spritz of water. I mixed it up with a brush and then tapped the loaded brush over the canvas to splatter the ink.
After a few minutes, you can tap off the excess onto a scrap sheet of paper and put it back in the jar. Then I added a few
glass hearts using glossy accents to adhere them to the canvas.
And finally, I added a pretty
butterfly. I gently bent the wings and then glued it down with a small dollop of heavy body gel.
I really love how this project turned out. It's the perfect mix of light pink, mauve and rose gold.
Creating heavily layered canvases like this can seem intimidating at first, but I hope that with this tutorial, it seems a little less scary. When you can see it deconstructed it just makes it so much easier to understand!
And my best advice is, if you want to try doing a project like this, be sure to buy lots of paper flowers and stock up on elements you can fussy cut! Also, if you don't want to play with resin for moulds, air dry paper clay is a good alternative.
This gorgeous beauty is now hanging up on my bedroom on my project gallery wall, where I see it every morning before starting my day. That wall is such an amazing piece of inspiration and it really shows my creative journey with my mixed media canvases.
I didn't start out doing these heavily layered projects but always wanted to achieve this look. It took some learning and viewing every angle of work done by those who I found inspirational. I hope I have been a small bit of that inspiration for you.
Be sure to drop any comments or questions you have below! I'm happy to share my knowledge and love hearing from all of you! Until next time, happy crafting!
Adrienne
Shop the Supplies:
ReplicaSurfaces
Love the background I shot my photos on? It's from Replica Surfaces, a company that makes rigid photo-realistic backgrounds. This surface is called Biscotti Linen You can pick up your own with a 15% discount by shopping this link. When you do, I get a small commission from the sale at no extra cost to you, which helps me continue to provide you amazing tutorials and information, just like this blog post!
Reneabouquets
Watercolor Sun Candy Butterflies
Gawdie Girl Pale Pink Glitter Glass
Beautiful Beads Glass Hearts
Lovely Lace Shoppe
Guipure Non-Stretch Lace Trim with Metallic Centers in Rose Gold
Scrapbook.com
I am an affiliate with Scrapbook.com. When you shop the links below, I receive a small commission from the affiliate, at no additional cost to you. This helps me balance the costs of the time and love I put into my projects and blog so I can continue to share my ideas with you for FREE. If you shop the links, thank you! I greatly appreciate it.
Below are products that I used or similar products.


No comments:
Post a Comment
I'd love to hear your thoughts!