I know that the holidays are over, but the all the shipping delays caused me to get backed up on my holiday makes.
By the time everything arrived, I was in the throes of making last minute holiday cards. That’s okay though. So while Christmas has officially come down in the main part of the house (I’ve clung on to my mini tree in my craft room and my garland over my headboard), I can still enjoy creating holiday makes. Why wait until next year? It’s like getting a jump on the holidays for this year!

Ever since I received the window frames in my Halloween order, I knew I wanted to make a vignette for
Christmas tree with them. Lately I’ve also been a bit obsessed with pastel and wanted to create something with an unconventional palette. In my craft room, my mini tree is rose gold—so I pulled out my pink sprays to create a pink tree for my window scene! For my tree, I used kitsch flamingo
Distress Spray Stain and
Distress Oxide Spray and the
winterberry Mica Spray to color my tree. Before spraying it all up, I trimmed it down to fit in the box by snipping off the bottom and giving the tree a haircut in the back so it would lay flat in the box.

While my tree dried, I dry brushed
white paint onto the insides, sides and back of my vignette box that fit the window frame I chose. I also cut out a piece of diagonal stripe pastel blue and white paper from
P13’s Cosy Winter Sugar and Spice Maxi Pad as well as fussy cut a nutcracker from the same collection. I then glued the striped paper inside the box using
Smart Glue.
While the glitter was drying, I pulled out some
mica tiles and ripped a couple of pieces to fit my window so that it would appear icy at the top and bottom. Before glueing it in place, I bent it gently to add fractures to the mica to make it look icy. I then added some
icicle paste to the mica to give that extra icy oomph. Once the icicle past was dry, I added some snowfall paste.
I drilled a small hole in the back of my box and strung a set of
tiny lights to through. I wrapped it around my tree and then snipped off the excess (I left a few extra lights on the end to add to the top of the box to light up the mini icicles a bit. I glued the nutcracker in place with Glossy Accents and then the tree in the box with heavy body gel. I also secured the end of the light string in place with a small dollop of
heavy body gel. See the photo below for what the inside of the box looks like prior to placing the window frame on top.
I then added some
baubles and a
mirrored star to the tree using Glossy Accents. Now that everything inside the box was done, it was time to glue down the
window frame and the mini icicles using Glossy Accents.
While my box was drying, I spritzed a piece of
Mixed Media Heavystock with the same pink sprays as the tree. I sprayed both sides of the paper and dried it with my heat tool. To flatten it out, I ran it through my
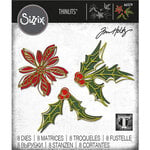
Minc machine (this is an optional step, but makes it easier to place your dies on the cardstock). I ran this inked paper through my die cut machine with the base layer of the
Seasonal Sketch die three times.
I then cut the upper layer of the die from
silver kraftstock twice. I used some shaping tools to shape the flower cuts and then glued the layers together in this order: two pink, a silver, a pink and a silver. I cut a little bit of crinkle ribbon, tied a bow, sewed on a
tiny bell and glued it to the top of my box. I then added some pink lace, a snowflake charm hanging from
silver thread and the pink poinsettia.
All that was left was to create a
little box to hold the battery pack for the tiny lights. And that’s it! I hope you enjoyed this belated holiday make. Don’t be surprised if you see more holiday makes from me randomly throughout the year—both Halloween and Christmas! I bought a lot of stuff and had no time to use it all! Until next time, happy crafting!
Adrienne
ReplicaSurfaces
Love the background I shot my photos on? It's from Replica Surfaces, a company that makes rigid photo-realistic backgrounds. This surfaces are called Biscotti Linen and Toasted Marble You can pick up your own with a 15% discount by shopping this link. When you do, I get a small commission from the sale at no extra cost to you, which helps me continue to provide you amazing tutorials and information, just like this blog post!
Scrapbook.com
I am an affiliate with Scrapbook.com. When you shop the links below, I receive a small commission from the affiliate, at no additional cost to you. This helps me balance the costs of the time and love I put into my projects and blog so I can continue to share my ideas with you for FREE. If you shop the links, thank you! I greatly appreciate it.
Below are some of the products that I used.


No comments:
Post a Comment
I'd love to hear your thoughts!