Acetate isn’t just for shaker cards and tags!
This fun card technique was
inspired by a friend of mine. She put glitter paste through her stencils and created a floating card front of acetate over a white card base. It was absolutely stunning and I just had to try it out!
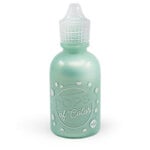
For my floating card front, I decided to use pearlescent
Pops of Color. This embellishment has a thinner consistency than other drops so to get it to go through a stencil nicely, you just have to mix up a bit of the drops with another art medium. I used
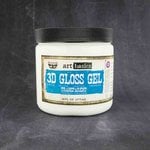
3D gloss gel, which has a transparent base giving it a very ethereal look.
Simply put a small dollop of the 3D gloss gel on your
non-stick craft mat. Squeeze some of your Pops of Color onto the gel and then mix it up with a palette knife. The more Pops of Color you add, the deeper the color, but also the thinner your mixture. So if your stenciled image doesn’t come out clean, add more 3D gloss gel and give it a go again.
To help you keep your stencil in place over the slippery acetate, use strips of
4” mint tape to hold the stencil onto the acetate—I tape it on the back of the stencil and acetate. Then
scrape your mixture through the stencil and remove the stencil from your acetate. Make sure that you clean off your stencil right away.
Your stenciled image should dry pretty quickly. Once it’s dry, trim it down if needed, then place
foam squares on the back in strategic locations. Then glue the acetate down over the card stock base.
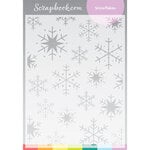
All that is left is to stamp and emboss your sentiment, maybe back it with some
glitter paper for a little extra sparkle and add a few
gems if desired!
Super easy and super fun! Until next time, happy crafting!
Adrienne
Shop the Supplies:
ReplicaSurfaces
Love the background I shot my photos on? It's from Replica Surfaces, a company that makes rigid photo-realistic backgrounds. This surface is called Shiplap. You can pick up your own with a 15% discount by shopping this link. When you do, I get a small commission from the sale at no extra cost to you, which helps me continue to provide you amazing tutorials and information, just like this blog post!
Scrapbook.com
I am an affiliate with Scrapbook.com. When you shop the links below, I receive a small commission from the affiliate, at no additional cost to you. This helps me balance the costs of the time and love I put into my projects and blog so I can continue to share my ideas with you for FREE. If you shop the links, thank you! I greatly appreciate it.
Below are products that I used or similar products.


No comments:
Post a Comment
I'd love to hear your thoughts!