I’m here to remind you that simple can be stunning. You don’t have to go all out to create something beautiful and meaningful.
I know I have a tendency to go all out when creating a project. It’s sort of in my nature. My life’s motto is,
“When life gives you lemons, make PINK lemonade,” because that is what a classic overachiever does. But I’ve been trying to be better about creating more simple projects lately. And because I need to remind myself, I though you might need that reminder too.
With the “simple is stunning” thought running through my head, I set out to create two festive cards from one stamp set. I kept the color schemes simple and balked at tons of embellishments. (Whoa, hey, where is the “you can never have too many paper flowers” girl at?!)
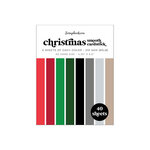
For the first card, a Christmas card, I chose a
deep green-blue piece of cardstock. I then stamped the tree and star topper onto the cardstock using embossing ink. I used one of Scrapbook.com's newest stamp sets that they sent me, the Festive Tree and Greetings set. As of publishing this blog, it's not quite available yet. but if you love it and want to have it for next year, visit
this link and click on the "notify me" button!
On a side note, I’m not much of a stamper and I have a chronic pain disorder that can make it difficult, so if you are like me, I highly recommend getting a
stamping platform and using the
Stampendable tool to make it easier on your hands.
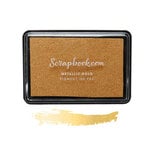
I loved all the detail in this stamp, so knowing this, I chose to emboss with Ranger’s
Super Fine embossing powder in copper. The smaller granules really do create a stunning image, with even the thinnest of stamped lines.
For the sentiment, I chose a label sticker from the
jewels Sticker Book. I thought the deep teal label with the rose gold accent really matched the color scheme I had chose so far. I stuck the label down onto a piece of cardstock, allowing me to hold the sticker in place with magnets on my stamping platform. I stamped with the same embossing ink and applied the same embossing powder.
For the second card, I wanted to create a New Year’s card. I love the idea of a New Year’s card because sometimes you just don’t have enough time to create and send everyone a Christmas card. Plus, they are so different and they don’t get lost in the crowd of Christmas cards. Okay, enough of that tangent.
To incorporate the stamp, I chose the star topper, stamping it onto another piece of
black cardstock. I think this little burst looks like the center of a firework, or maybe a sparkler too! I embossed using the
Ranger Super Fine embossing powder in gold. I set this aside for the moment and moved on to the sentiment.
I chose a label sticker from the
black and white Sticker Book and embossed my sentiment in the same manner as the other card. I applied the sticker to another piece of cardstock, stamped, embossed in gold and then cut the sticker from the cardstock. I adhered it to the card front with some
foam adhesive.
Next, using a small circle punch, I punched out the embossed bursts. I added a
small foam square to the back of each and adhered it to the center of each firework. For just a touch more sparkle, I added some
Pops of Color in champagne glitter to the card.
And that is it! No mixed media techniques, no handfuls of flowers. Just simple embossing, stenciling and stickers. And I really the Festive Tree and Greetings stamp set from Scrapbook.com. It has so many possibilities with the Christmas and New Year’s sentiments as well as the small snowflakes and star burst. I can’t wait to see what you make with this stamp!
Until next time, happy crafting!
Adrienne
Shop the Supplies:
ReplicaSurfaces
Love the background I shot my photos on? It's from Replica Surfaces, a company that makes rigid photo-realistic backgrounds. These surfaces are called Shiplap and White Lights. You can pick up your own with a 15% discount by shopping this link. When you do, I get a small commission from the sale at no extra cost to you, which helps me continue to provide you amazing tutorials and information, just like this blog post!
Scrapbook.com
I am an affiliate with Scrapbook.com. When you shop the links below, I receive a small commission from the affiliate, at no additional cost to you. This helps me balance the costs of the time and love I put into my projects and blog so I can continue to share my ideas with you for FREE. If you shop the links, thank you! I greatly appreciate it.
Below are products that I used or similar products.


No comments:
Post a Comment
I'd love to hear your thoughts!