I went outside of my comfort zone with this brightly colored mixed media canvas.
My style meeter usually has 2 settings: pastel shabby chic or dark and gothic. I know, I know...those are two very different styles. But the dark and gothic usually comes into play around Halloween when I let my dark side show. I hardly ever do bright and colorful but this project ended up taking me there. I definitely stuck to my floral roots, but the brighter yellow is a very unusual color for me to choose. But I think I like where it went.
I started by painting the entire 8x8 inch canvas with Distress Paint in Mustard Seed. I made sure to spritz it as I went and blot extra color up (as Tim has said multiple times, Distress Paint is a little different because once it's dry, it's permanent and no longer water reactive).
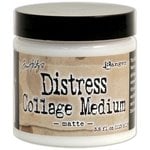
Once dry, I added a little bit of collage paper with
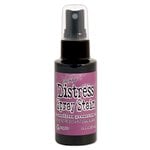
matte Collage Medium. I then spritzed the canvas with a little bit of Distress Oxide Spray and Distress Spray Stain in Fossilized Amber for a bit more dimension and to make the canvas just a little less bright. Then to add a little more interest to the canvas, I used
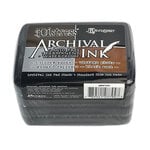
Distress Archival in Black Soot to add a bit of the script stamp from the
Entomology stamp set.
Next I cut out the
Perspective Butterfly from some black cardstock. I then traced the outline of it onto some white cardstock and cut this out with scissors. I then sprayed the white butterfly cut with Distress Spray Stain in Seedless Preserves as a base layer, then spritzed it with the
Distress Mica Spray in Hocus Pocus.
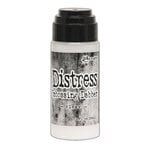
I covered the black Perspective Butterfly with embossing ink from the
Distress Embossing Dabber then used some Ultra Thick Embossing Enamel (UTEE) from Ranger that I still had ferreted away in my stash. I saw someone in the Tim Holtz Addict Facebook group layer on clear embossing powder on the Perspective Moth die and loved the effect so I had to try it for myself!
Next I glued the bodies of the two butterfly cuts together then gently bent the wings of both layers. I also used a large round bottle to shape the wings just a bit for more dimension. I then glued the butterfly, some
paper flowers from Prima and some lace (spritzed with Seedless Preserves) onto the canvas. And to finish it off, I added a
sticker sentiment and a few gems.
It's really different from my usual style but I'm glad I let myself just play and see where the make took me. I admit that I need to experiment a bit more so I can get out of my "style box" more often. I think doing so can lead to some fun new discoveries and help me improve my go to style even more! Until next time, happy crafting!
Adrienne
Shop the Supplies:
ReplicaSurfaces
Love the background I shot my photos on? It's from Replica Surfaces, a company that makes rigid photo-realistic backgrounds. This surface is called Shiplap. You can pick up your own with a 15% discount by shopping this link. When you do, I get a small commission from the sale at no extra cost to you, which helps me continue to provide you amazing tutorials and information, just like this blog post!
Scrapbook.com
I am an affiliate with Scrapbook.com. When you shop the links below, I receive a small commission from the affiliate, at no additional cost to you. This helps me balance the costs of the time and love I put into my projects and blog so I can continue to share my ideas with you for FREE. If you shop the links, thank you! I greatly appreciate it.
Below are some of the products that I used or similar products.


No comments:
Post a Comment
I'd love to hear your thoughts!