I adore persimmon and teal as a color combination. You'll find both hues throughout my home decor year round, but that rusty orange color always makes me think of crunchy autumn leaves.
Today I'm sharing this mixed media autumn hued vignette. I couldn't resist creating another mixed media project this month!
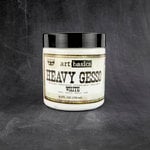
We eat quite a bit of brie cheese in our house and I save the majority of the empty brie wheel boxes because they make great foundations for mixed media projects. To start this project off, I painted the top and sides with white gesso, just to create a clean and grippy base for adhesives and paint.
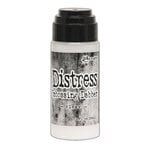
Next I painted the sides of the box with
Distress Paint in Rusty Hinge, splattering it with a bit of water to create a distressed reaction. Once it was dry, I splattered it with a bit of thinned white gesso.
I then traced the box onto some patterned paper from the
P13 Forest Tea Party collection. I cut it out, distressed the edges and then glued it down to the top of the brie box with collage medium. (Pro Tip: To create a smooth application of paper on a surface with liquid glue, use a
craft scraper to spread the glue and to get air bubbles out.)
Then I applied little bits of
Smart Glue here and there over the top of the paper. This glue remains tacky even after fully dried so it's perfect for adding foil. Once dry, I added
Prima metallic coper flakes over the glue and then burnished it with a soft paint brush. (Make sure to overfill so you don't get adhesive in your paint brush bristles.)
Before assembling all the embellishments on my box, I wanted to get all of my little parts ready. First, I fussy cut several elements from P13's Forest Tea Party collection, including that sweet little fox! I also cut apart some
Reneabouquets chipboard into smaller pieces. I used the
Distress Embossing Dabber to add embossing ink to one side of the chipboard, then heat embossed
Distress Glaze in Rusty Hinge on it. I love how the white base of this chipboard really makes the Distress Glaze color true and brighter.
Now on to assembling all of my embellishments! Next I cut some
scalloped lace from Reneabouquets and adhered it with a little bit of
collage medium. I then used heavy body gel to glue down several Reneabouquets paper flowers. Placing these onto the lace really secures it to the project base.
I then tucked the pieces of embossed chipboard in, adding some collage medium or
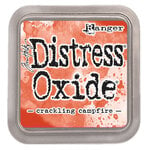
foam adhesive to the back to help hold it in place. I used a shaping tool to add more dimension to the fussy cut elements (orange butterfly, fox and leaves). I also dabbed a bit of
Distress Oxide in Crackling Campfire to the backs of some of the leaves using a
domed foam blending tool. I then glued the fox down with foam adhesive, covering the foam adhesive popping up the chipboard underneath. I used collage medium for the other fussy cut elements.
I then glued down a gorgeous
Reneabouquets butterfly to the largest flower using a bit of Glossy Accents. I love these butterflies because they are so detailed and you can gently bend the wings for more dimension. And you can choose your antenna color (I went with copper for these because it matched the orange in the butterfly's wings).
I hope this project has gotten you into the mood for Autumn. While I do love my gardens and my bees, I also love fall, the crisp air, pumpkins and crunchy leaves. Plus I needed more fall decor (I have mostly Halloween).
This Sunday I'll have a new scrapbook layout for you featuring fussy cut elements and stickers! Until then, happy crafting!
Adrienne


No comments:
Post a Comment
I'd love to hear your thoughts!