
On the Coast: An Altered Art Mixed Media Lighthouse Project
Times are strange but it was important for me to help my niece have as normal a first birthday as possible. But it was coming down to the wire and I was scrambling to get decor done. Luckily, this little altered art project didn't take very long.

Back when I found the whale sign at Goodwill, I also came across this lighthouse. It started out as maroon and white (the white had aged and was yellowing--yuck!). I started by painting over the entire surface with a white chalky finish acrylic paint. I then decided I wanted to light this thing so I pulled out my micro Dremel and my drill. I used a circular blade on my Dremel tool to cut the top off and then use my drill to drill a hole through the top and the bottom big enough to fit a strand of Tim Holtz's tiny lights. I also drilled a hole in the base just to the back side of the lighthouse. This would allow me to attach the battery pack to the back of the lighthouse, keeping it discreet.

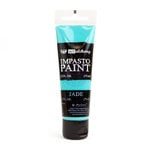
I also used chipboard to cover the lip that I knew would just collect dust over the years. I created a ledge of chipboard and then placed another piece of chipboard over that to crate a flat top surface that would be easier to dust. I then used washi tape to tape off the stripes, using Finnabair's Impasto Paint in jade. I knew this color theme would better fit my sister's decor. Once that was dry, I went back in and dry brushed the white paint to create a distressed look to the stripes.

Once everything was painted, I started working on the lights. I wanted a marble to sit in the top as a sort of giant "light bulb" so I created a roll paper stand for it to sit on. I strung my tiny lights through, starting just behind the lighthouse, going down through the hole in the base, then up through the hole into the center of the lighthouse. I used tweezers, putting them through the circular window, to help me get the end of the lights up through the hole in the top.

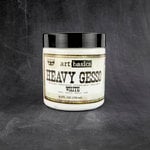
I used hot glue to attach the end of the lights to the inside of the rolled paper the marble would sit on, then glued the rolled paper to the top over the hole the lights came through. I used a combination of hot glue and Tim's Distress Collage Medium to glue the paper down and then used the collage medium to glue the marble on. I then used Finn's heavy body gel to glue the roof back on to the top of the lighthouse and then let this dry overnight before moving on.

The next day, when everything was nice and dry, I cut out a starfish from chipboard from Tim's Sand & Sea die. I also added some of Tim's Distress Grit Paste to the starfish as well as the base of the lighthouse to make it look like sand. As this was drying, I moved on to coloring some white flowers with color mist. I used Cookie and Curious from Marion Smith's Color Lab. While these were drying, I went back to the lighthouse.

The inside of the lighthouse wasn't painted so to hide that, and to diffuse the lights, I cut out some vellum and white cardstock to cover the open window and door. I used Tim's collage medium to glue these little "covers" on. I also painted the base of the lighthouse and the starfish die cut with Finn's Impasto Paint in linen--a nice sand color! When that was dry, I added a wash of Tim's Distress Stain in walnut stain, mopping up excess with a paper towel, to create shadows.

Finally, I started on the finishing touches. I used Finn's heavy body gel to attach the flowers, starfish and seashells and Tim's collage medium to attach the pearls. I also added KiaserCraft paper blooms to the mix. And finally, I added a little sticky backed felt to the bottom of the lighthouse's base so it wouldn't scratch up the surface it sat on.

This little piece made a nice little addition to my niece's first birthday (a small socially distanced family gathering). And afterward, my sister was able to add it to her home's decor!
Products Used
Tim Holtz: Alterations - sand & sea; Distress - grit paste opaque, collage medium matte; Distress Stain - walnut stain; Idea-ology - tiny lights, baubles | Dina Wakley: Media - white gesso | Prima: Art Basics - heavy body gel; Art Alchemy Impasto - jade, linen; Flowers - purity II | KaiserCraft: Paper Blooms - sea breeze | Bazzill: Specialty - vellum | Scrapbook.com: Chipboard - natural | Marion Smith Designs: Color Lab - cookie, curious | Recollections: Cardstock - white; Flower Shoppe - mini white, small white | Other: sea shells, white chalk paint, hot glue, Dremel tool, drill, iridescent large marble
Happy Crafting!
Adrienne
I am an affiliate with Scrapbook.com. When you shop the links below, I receive a small commission from the affiliate, at no additional cost to you. This helps me balance the costs of the time and love I put into my projects and blog so I can continue to share my ideas with you for FREE. If you shop the links, thank you! I greatly appreciate it.
Below are some of products that I used or similar products.


0 comments
I'd love to hear your thoughts!