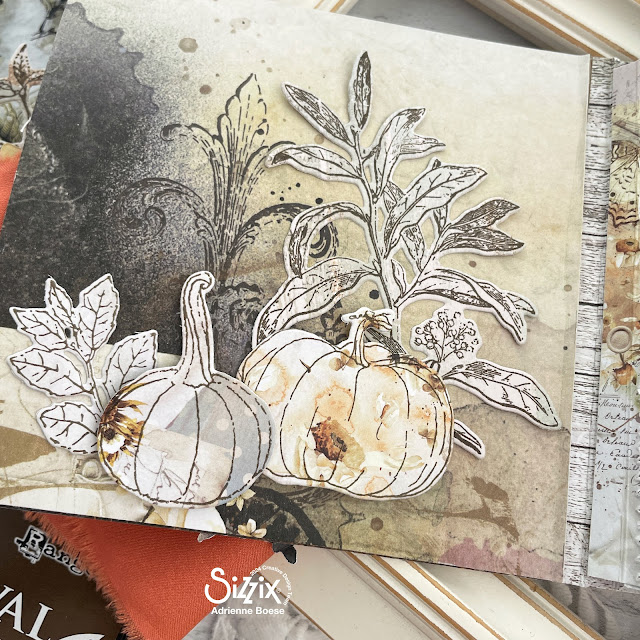
I was itching to create an autumn inspired mini album, featuring leaves and pumpkins. Here is what you need to create your own version of this mini album using the new Eileen Hull Sizzix Mini Album Bigz die!
Hello, crafty friend! I know that a lot of my autumn crafts are more geared toward Halloween, but I love a good pumpkin spice latte and the color palette of autumn. So today's project is all about my favorite season!
I used the new Sizzix Mini Album Bigz Scoreboard die designed by Eileen Hull to create the cover of this album. I die cut the album from chipboard, using the Extended Premium Crease Pad to ensure that the score lines only score and don't cut. I then cut the album cover again from some white cardstock and used these pieces to trace and cut out the patterned paper (from Prima Marketing). This allowed me to cut exactly where I wanted for the patterned paper design for the outside and inside covers.
(I've got all of the supplies I used listed at the bottom of this post!)
I also used the Floral Damask embossing folder and some stencils from The Visiter Sizzix Studio stencil and stamp set to create texture. I used my Spellbinders September 2024 Stitching Die of the Month (the stitched sunflower) to decorate the album along with ephemera from Prima's In the Moment Collection, and of course some lovely stamped pumpkins and leaves from the Pencil Line Harvest and Forever Leaves stamp and framelit sets. I used these stamps throughout the album because they are perfect for autumn!
I added a waterfall mechanism to the binding, using my Sizzix Scoring Board and Trimmer Tool. Here are my measurements and scoring lines:
- Cut the paper to 5 inches tall by 2.5 inches wide
- Score every 1/4 inch
Fold at your scorelines for the waterfall mechanism and glue the tabs together that you'll mount your pages to. Cut the tabs on each end at an angle then glue your mechanism to the binding.
To cover the outside binding, cut a piece of Gold Opulent Cardstock to fit the binding, scoring the flaps that overlay the front and back of the outside cover and glue in place.
Then you can make all of your pages! I cut some squares out, then rounded the outside corners. On a few of the pages, I added extra flips and even a pocket on one. The pockets were simply created by cutting a few rectangles, notching the top with a circle punch and then sewing the pockets to the page or flip to create the actual pocket.
I also added photos, journaling cards, notched banners, sentiment stamps, ephemera, stickers and more to all of my pages.
The patterned paper that I chose had some nice elements on it too. In the photo below, I added a little ephemera with a stamp layered on top and a notched banner below. I used my Tiny Attacher to add it to the page.
I just love the simplicity of this album. It really is just layering a bunch of paper elements.
And not every page needs to have a photo!
I cannot believe how perfectly these leaf stamps pair with this paper collection from Prima and it totally matches the vibes of my niece in her photos.
And by stamping on patterned paper, you create so much dimension and texture in your leaves and pumpkins that you don' need to do anything but stamp and cut with the framelit!
And just one more internal page with my niece sitting on a truck with some pumpkins and hay.
The inside back cover had more stamped images with a piece of door ephemera.
And the back featured more of the embossed cardstock and patterned paper. To add the ribbon, I sewed it onto the embossed cardstock then glued the cardstock to my album. This makes it nice and secure.
And that's it! It's so simple and fun to make a little mini like this and I hope that you'll give it a try!
Until next time, happy crafting!
Adrienne
Shop the Supplies:
Scrapbook.com, A Cherry On Top, Spellbinders, Sizzix & Amazon
I am an affiliate with multiple companies. When you shop the links below, I receive a small commission from the affiliate, at no additional cost to you. This helps me balance the costs of the time and love I put into my projects and blog so I can continue to share my ideas with you for FREE. If you shop the links, thank you! I greatly appreciate it.
You can also use the code adrienne15 for 15% off your order on the Prima Marketing Retail site.
Below are products that I used for this project.


Hi. Your album is beautiful!! I wanted to ask a question. Did you just cut your album with mat board, then apply pattern paper? The you cut cardstock with the steel die, and used that as a template to cut patterned paper that you applied to covers and spine? If so did you use adhesive to apply paper, rather than glue? If that's what you did I think that's a very interesting way to cover the albums. Ty
ReplyDeleteHi! I go through those steps in the 3rd paragraph, but if they weren't clear, I cut the album cover from chipboard using the crease pad so the score lines score and don't cut. Then because I wanted a certain section of the pattern and you can't see that when cutting with the Bigz dies (vs. Thinlits), I die cut the album from some white cardstock. Then I traced the cardstock shape on my patterned paper exactly where I wanted it, cut out the patterned paper with scissors, then glued the patterned paper to the chipboard base. I believe I used Sizzix Express Glue for that and then used the brayer on my multi-tool to laminate the patterned paper to the chipboard.
Delete