
Journaling cards are perfect for pocket page albums. But when creating a full page layout, how can you get out of the boxy shape and incorporate them into your layout in a natural way. Get out your scissors and a cup of coffee to find out!

Hey, crafty friends! National Scrapbooking Day this year is May 4th this year and with that in mind, I wanted to go back to what got me into paper crafting in the first place--12x12 layouts!

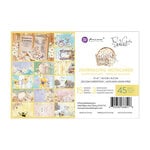
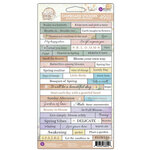
Paper collections come with a lot of coordinating embellishments and that gives us all plenty of options. Prima Marketing's collections often come with one or two sizes of journaling cards and I think these are an often underused item in full page layouts. I think that is because they are boxy and people feel limited by them. So let's talk about a couple of different ways you can use them to get out of that box.

First is by fussy cutting out icons or elements from them. I fussy cut this particular journaling card from Prima's In Full Bloom collection to use as my title for my layout. There are some other great icons in here like bees (which I fussy cut for a mixed media project), butterflies, garden arches and more.

I recommend a good pair of small ergonomic scissors or a swivel craft knife and self-healing mat to fussy cut elements out with. Put on a podcast or a movie and cut to your heart's content. Make sure you check out my tutorial and video on how to fussy cut like a pro for my tips.

Another option is to die cut from these just like any other patterned paper! The B sides of journaling cards often have a lovely background that are perfect for die cutting. For this layout project, I also die cut some of the leaves from the Scrapbook.com Market Bloom Florals die set using the green B sides of one of the journaling cards (since you get 3 of each design in Prima's journaling card sets, I have no problem doing this--especially when I only need a few small die cuts!)
Now let's get into some of the other things I did to create this pretty little layout. I used Prima's In Full Bloom collection along with adhesives and dies from Scrapbook.com.

I chose the green and terracotta paper with floral print down the center for the background of my layout. What I love about these floral elements on the paper is that makes it look like you've created a large floral cluster, but you don't have to use a bunch of paper flowers or ephemera to achieve that look. Here, you can see the floral elements on the paper on the right and left sides.

I backed the 4x6 photo with some 2 mm thick foam sheet and placed it over where the floral element line on the paper dips down, which puts the picture slightly off to the left side of the page. To give you some wiggle time on placing the picture just right, add a little Artis glue to the foam. You'll have the benefits of the dimension the foam adhesive gives, but the wiggle time of liquid adhesive all rolled into one!

While fussy cutting out the journaling card and die cutting, I also fussy cut out some of the paper daisies and a butterfly from the 12x12 paper pad and pulled some of the small florals from the paper ephemera pack. I placed these and one of the vellum ephemera butterflies into some Stack-N-Sort Trays so I would have them on hand for assembling everything.

I used a variety of 1, 2 and 3 mm thick foam adhesive for popping the fussy cut title up. On the upper left side of this title, the floral cluster gets cut off the journaling card. So to hide this, I shaped some of the fussy cut daisies with the Sizzix Tim Holtz shaping kit, and layered them over that top corner of the title, using liquid and foam adhesive.

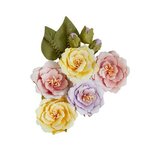
The rest of the layout is pretty straight forward. I tucked some of the large and small daisies from the Garden Whispers and Petite Petals flower packs under the title piece and on the left side of the photo. I also added in some pink flowers from the Sunday Afternoon and Spring Breeze flower packs. My favorite adhesive for flowers is Finnabair's Heavy Body Gel--this has a longer work time than liquid adhesive, so that will allow us to tuck things for a bit.

Once the flowers were in I added the die cut leaves under the larger flowers, which I also shaped before tucking them in. Then I added in some more of the fussy cut daisies and the ephemera flowers, all of which were shaped with the shaping tools for more dimension. For the paper elements, I do like the foam adhesive and liquid adhesive, but if you stick it into some of the Heavy Body gel that's under your flowers, that also will hold on to your elements.

I added one of the purple butterflies from the Elegant Wings set using Heavy Body Gel. Then I bent the wings up on the die cut butterflies from the Butterflies 2 die set, as well as the vellum butterfly and fussy cut butterfly. I used some foam strip adhesive to pop some of these butterflies up and Artis glue for others.

I also layered two of the Bow Toppers die cuts on top of each other after shaping them with the shaping tools and tucked it into the left floral cluster. After that, all that was left was to add some chipboard sentiments and some crystals!
I hope that you feel inspired to get out of the box and use your journaling cards in new and creative ways! Until next time, happy crafting!
Adrienne
Shop the Supplies:
Scrapbook.com
I am an affiliate with Scrapbook.com. When you shop the links below, I receive a small commission from the affiliate, at no additional cost to you. This helps me balance the costs of the time and love I put into my projects and blog so I can continue to share my ideas with you for FREE. If you shop the links, thank you! I greatly appreciate it.
Below are some of the main products that I used for this project. If you want to see the full supply list, check out my gallery post!


No comments:
Post a Comment
I'd love to hear your thoughts!