I’m a big fan of non-traditional holiday colors, but sometimes, you just need a classic red, green and gold project and Reneabouquets has some gorgeous Christmas-inspired embellishments that are absolutely perfect for this classic color project!
I’m so excited to be back with another guest design for Reneabouquets this month! And this post is extra special because I’m also hosting a Reneabouquets giveaway over on my Instagram account. So make sure you head over there and check out the giveaway post to see how to enter for some of Renea’s newest Christmas yummies that you could win!
Let’s get into this tutorial because I’m so excited about this project! I always pre-pour my resin moulds so they have a chance to set up fully before I use them in my projects. I use the Alumilite Amazing Casting Resin that sets and can be demoulded in 10 minutes, but it takes a few hours to fully cure so it’s not flexible. And we don’t want these moulds flexible while working on this project.
I poured resin into some large ornament shapes in the Redesign Silver Bells, Victorian Adornments and Wonder Gems moulds. I removed them from the moulds after 10 minutes then let them cure overnight.
The next day I started in on my project. I began by tracing a 12 inch wooden circle on a piece of patterned paper with a reindeer and sleigh motif from Prima Marketing’s Christmas Market collection. I cut the circle out then distressed the edges of the paper with a distressing tool. (If you want to watch me assemble and layer this project, be sure to check out my YouTube video!)
To glue the paper onto the wooden base, I applied a thin layer of Finnabair’s Soft Matte Gel to the back of the paper with a silicone brush. I then pressed the paper onto the wooden surface using a brayer to get any air bubbles and wrinkles out and to smooth the adhesive gel.
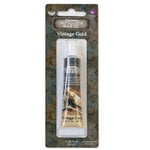
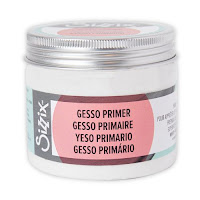
To decorate the resin ornament moulds, I first painted them with white gesso. Once the gesso was dry, I painted them with Finnabair’s Impasto Paint in Linen. Then after the impasto was dry, I added Metallique Wax in Gold to the raised area of each mould.
Next I wanted to add lace so I laid the Reneabouquets
Wide Gold Embroidered Lace over the bottom half of the circle base. I trimmed the lace to fit the circle. Gluing down the resin ornaments will hold this lace in place so don’t worry about tacking the lace down for right now.
Using a hot glue gun, glue the ornaments in place along the center of the circle, staggering them. I used pieces of cut up cardboard box under all of the ornaments to pop them up. I used one to three layers of cardboard so that the ornaments were also at varying heights. Make sure that two of the ornaments and cardboard overlap the lace to hold it in place.
Before moving on to gluing things down on the project, I die cut a bunch of leaves and some evergreen branches from some pearlescent gold cardstock using the Sizzix Festive Foliage die.
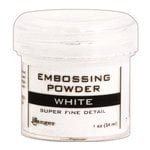
I also covered the Small First Snow snowflake chipboards in embossing powder. I wanted to use a pearlescent white but I wanted them to have a super white base. So I first covered the snowflake in Ranger’s Super Fine White embossing powder. Then I added a layer of Lindy’s Magic Moon Pearls embossing powder.
I always like to dry fit my flowers and chipboard frame, laying everything out without glue to plan the line of embellishments. It makes the process of gluing everything down much easier, especially when doing a floating frame technique.
It’s important to make sure that when doing the floating frame technique that you support the frame with flowers on opposite sides. In this case, I supported the frame on the left and right side with some flowers, letting it be open the top and bottom.
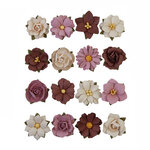
To see how I laid out my flowers and other embellishments, be sure to check out my YouTube tutorial. It’s much easier for me to show you than to tell you when it comes to gluing down the other embellishments. And for a full list of the Prima Marketing flowers that I used, visit the bottom of this post where I’ve linked all of my supplies used!
As I worked on gluing down flowers with heavy body gel, I tucked in some of the die cut leaf sprigs after giving each one a little shape. I also began tucking in some of the Large Holly and Berry Tuck Ins as well as some of the snowflake chippies. I also rip the greens off the back of each flower as they don’t always match the project or match from one flower collection to the next and I didn’t want 5 shades of green in the mix.
As I worked, I kept dry fitting the frame to make sure that it would be level. If something wasn’t quite level, I would tuck in a little bit of cardboard a small flower. I glued the Large Holly and Berry Frame to the flowers using hot glue. Then I glued more flowers down on top of the frame, tucking in more die cut leaves and chipboard elements as I went.
Once all the flowers, chipboards and die cuts were on, I added touches of “snow,” dabbing some of Finnabair’s Snowflake Paste onto the project. I dabbed it on flowers, chipboard, moulds, die cuts and the paper base. I even added the paste to the edge of the circle base.
Next I added glitter glass, gluing it with some clear craft glue. I started by adding Diamond Shard Glitter Glass to the white, cream, coppery-red, bright red and green flowers. I also added some to the ornament moulds and die cut leaves. Then I added Vintage Red Shard Glitter Glass to the deep red flowers.
After I was happy with the amount of glitter glass sparkle, I added two Elegant Gold Glass Wing Butterflies to the flowers over the top of the frame. Then I added some Tiny Treasures Gold Tinsel Butterflies to the top and bottom of each flower line. The finishing touch was adding some color-coordinating pearls to the mix.
This color palette is something different for me, but I really hope that you love this project as much as I do and that it inspires you to create something beautiful for the holidays! Make sure you don’t forget to head over to my Instagram and checkout the Reneabouquets giveaway that I’m hosting. Renea is offering some beautiful new Christmas themed goodies—some which would be a good option for your own little twist on this project! Until next time, happy crafting!
Below are the products that I used for this project.
Scrapbook.com & Sizzix
I am an affiliate with Scrapbook.com and Sizzix. When you shop the links below, I receive a small commission from the affiliate, at no additional cost to you. This helps me balance the costs of the time and love I put into my projects and blog so I can continue to share my ideas with you for FREE. If you shop the links, thank you! I greatly appreciate it.
Below are the products that I used for this project.
Amazon
I am an affiliate with Amazon. When you shop the links below, I receive a small commission from the affiliate, at no additional cost to you. This helps me balance the costs of the time and love I put into my projects and blog so I can continue to share my ideas with you for FREE. If you shop the links, thank you! I greatly appreciate it.
Below are the products that I used for this project.
Prima Marketing & Redesign with Prima
Below are the products that I used for this project. Use code adrienne15 for 15% off your order on the Prima Marketing retail site.


No comments:
Post a Comment
I'd love to hear your thoughts!