I'm always trying to find new elements to add into my mixed media projects. Today, we are looking at adding a custom sized envelope.
While I do make some cards, my heart lies in mixed media. That doesn't mean I don't love an envelope full of happiness!
For something different, I wanted to add an envelope to a mixed media project. I thought for a while how I wanted the project to look and what I wanted the envelope to hold. I kept circling back to that pocket of happiness vibe.
And what makes me happier than flowers, leaves and butterflies! So I decided to make it look like this envelope was bursting with flowers and leaves. Let's get into the tutorial!
I wanted to see how the new Tim Holtz Etcetera Panels held up to my favorite style of mixed media--which is a stenciled paste and Distress Spray background. So I took the smallest of the
rectangle panels and painted it with
white gesso. It's important to let your gesso air dry--if you go over it with a heat tool, it will bubble.
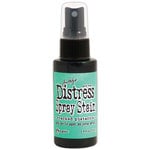
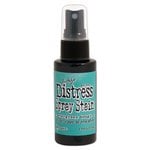
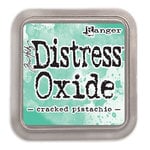
Next, I sprayed on several Distress Sprays. I used Cracked Pistachio (
Stain and
Oxide), Distress Spray Stain in
Evergreen Bough and Distress Mica Stain in
Merry Mint. I mixed and layered until I was happy with the result, drying in between each layer.
I let this panel fully set and dry overnight. If you have any warping in the panel from getting it wet from the sprays, it will flatten out overnight as it fully dries.
The next day I set to work die cutting everything and creating my envelope. For the envelope, I used the
8x8 Miel paper pad from Prima Marketing. I love the green floral wallpaper-like print and thought it went well with the colors I chose. I trimmed the paper down to a square 5 and a half inches using my
Sizzix Scoring Board and Trimmer tool.
I then pulled up on the spring loaded hub and slid the hub to the left and then rotated it to 45 degrees. When using the ruler at an angle, make sure you push back on the ruler after releasing the hub to lock it into place and get the truest angle. Based on the envelope generator sheet that comes with the tool, a 5.5 inch sized envelope requires lining up the bottom of the cardstock at the 7 inch mark on the mint ruler. I lined it up and then scored at the "score" line indicated on the mint ruler.
I then rotated my cardstock, aligned the score line I just made with the "align" line indicated on the mint ruler, and then scored again at the score indicator. I repeat this until it is scored on all four sides. I then use the corner rounder punch to round the corners of my envelope and the corner notch to notch where the score lines meet. Then I folded and glued my envelope, leaving the top flap up and open.
I then die cut coral, pink and green shades of cardstock from Sizzix's
Assorted Cardstock pack using the Layered Summer Florals and Flower Cluster dies. I die cut multiple layers of each layer of the flowers I chose,
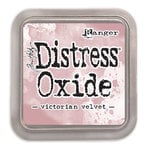
inked the edges with Oxide Inks for dimension, then
glued the layers together, leaving edges free to pull up and shape the petals a bit. This creates a more dimensional die cut and a fluffier flower!
To assemble everything, I stuffed a small handful of
sisal fibers into the envelope. I used some Miel flowers from Prima Marketing to pop the envelope up off the panel background, using
heavy body gel to glue everything in place.
I then added the die cut leaves and flowers to the envelope with both liquid adhesive and
foam adhesive, tucking a few leaves in amongst the Prima flowers as well. I also tucked in some scraps of lace and popped on a
Reneabouquets butterfly.
The finishing touch was adding some beads from the
Mint Julep sequin mix and some Pinkfresh jewels in
Ocean Breeze and
Bubblegum. What other items would you add to an envelope in a mixed media project? Drop a comment below, and until next time, happy crafting!
Adrienne
Shop the Supplies:
Scrapbook.com & Sizzix
I am an affiliate with Scrapbook.com and Sizzix. When you shop the links below, I receive a small commission from the affiliate, at no additional cost to you. This helps me balance the costs of the time and love I put into my projects and blog so I can continue to share my ideas with you for FREE. If you shop the links, thank you! I greatly appreciate it.
Below are products that I used for this project or similar ones.
Reneabouquets
Below are products from Reneabouquets that I used in this project.
Amazon
I am an affiliate with Amazon. When you shop the links below, I receive a small commission from the affiliate, at no additional cost to you. This helps me balance the costs of the time and love I put into my projects and blog so I can continue to share my ideas with you for FREE. If you shop the links, thank you! I greatly appreciate it.
Below are products that I used or similar products.


No comments:
Post a Comment
I'd love to hear your thoughts!