It’s time for a little 25 Days of Christmas celebration by making your own Advent Calendar!
I’m participating in Scrapbook.com’s
Christmas in July and was sent a few supplies to play around with. One of which was the
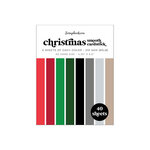
new 6x8 Christmas patterned paper pad! I loved all of the patterns so much that I knew I just had to use all of them and what better way than to create an advent calendar mini album!?
European advent calendars only go to 24 but I wanted this calendar to go to 25, since there’s no chocolate involved. Let’s jump right into this project and I’ll go over some of the details for each page of this mini album. In this blog, I’ll go over the cover through page 13. At the bottom of the blog will be a link to check out pages 14 through 25!
You’ll see that I also used the
Festive Numbers die set throughout this advent as well as adding a sticker sentiment from the
Peppermint Sticker Book to each page. I like to think of each sticker sentiment as an activity that can be done as a family, and they can be interpreted a little differently each year to make it fun year after year!
I also used the
Nested Fancy Circle Boarders die set to create the base of each page of this mini album. I used the internal cut and then saved all of the cute decorative die cuts to add to some of the pages. I began by planning out the order of my pages and the die cut all of the circles and then added sewing to each. I used a my
Crop-o-dile to punch a hole at the top of each circle so I could thread it onto a 3” binder ring.
For the cover, I chose the pink holly paper and I added an offset circle die and popped it up with
foam adhesive after adding a little red trim. The title uses both the Festive numbers die set and the Uptown lowercase alpha set. I fussy cut a few of the holly sprigs and added it to the the title circle. I created a paper tassel using the snowflake patterned paper and attached it a Tim Holtz
hook clasps and added a bunch of charms and beads. I finished off the cover with a sticker from the Peppermint Sticker Book and a few
jewels.
Page 1 I kept simple with a pleated ribbon trim, another
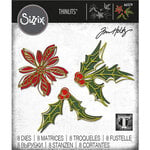
circle pop up for the number. I cut the upper layer of one of the leaves from the
Seasonal Sketch die from a piece of kraft metallic cardstock and tucked it under the number circle.
I added a
Sprig to the tag with a bit of stitching and then fussy cut a present and popped it on with a bit of foam adhesive.
Page 3 makes use of one of those cute little
doily circles for a bit of interest on an otherwise simple page. The 3 was cut from some
metallic cardstock to match the believe sticker and a few gems were popped on.
Page 4 features one of the
Nested Tree dies. After
stamping and embossing on the tree, I added a little lace trim and then sewed down the center of the it to attach it to the page. I then folded the tree in half around the sewing to add dimension. A few gems and some stickers were added.
Page 5 ended up being one of my favorites, but I think it’s because I love snowflakes so much! I used the
Snowflake Winter Wishes die to cut out the snowflake. I added stitching to the snowflake and then popped it on with
1/8” foam strip adhesive. I added the number and a sticker sentiment as well as several jewels!
Page 6 has a little aqua crocheted lace sewed on. I then cut a Merry Christmas sentiment from silver kraft metallic cardstock from Tim Holtz and added one of his
stacked hearts to highlight the number 6.
Page 8 uses a
little envelope sets to hold a piece of cardstock with the sticker sentiment and a fussy cut flower from the patterned paper pad. I also fussy cut several of the little houses from the pad of paper and added them using
Smart Glue and foam adhesive. I also popped on a
tiny clip from Tim Holtz.
Page 10 got a fun dangle of lace and another
little envelope. I cut out one of the nested tags and then trimmed it down to fit in the envelope.
I used the Stacked Hearts die from Tim Holtz, cutting out 3, and then sewing them together and folding them in half to add dimension.
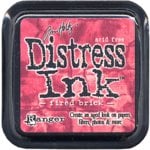
Page 11 has a little gold embossing and water coloring. I stamped the wreath from the
Winter Florals & Greetings stamp set then water colored it with Distress Inks. I cut the number 11 from gold metallic kraft cardstock and added a gem to the center of each little ribbon.
Page 12 is classic red, green and gold! I used the
Funky Festive and the Sprigs dies to added a little gold floral element to this page.
Page 13 veers from the traditional colors to non-traditional. I used another Nested Pocket die, Nested Tag die and Nested Tree die. I also cut the Seasonal Sketch die and Sprigs die
in pinks then added a bunch of gems to the center of the flower. A little lace dangle was sewn underneath before attaching the flower.
Head over to part 2 now to see the last set of pages for this fun mini—you don’t want to miss the last page!
Shop the Supplies:
Scrapbook.com
I am an affiliate with Scrapbook.com. When you shop the links below, I receive a small commission from the affiliate, at no additional cost to you. This helps me balance the costs of the time and love I put into my projects and blog so I can continue to share my ideas with you for FREE. If you shop the links, thank you! I greatly appreciate it.
Below are the main products that I used in this project.
Amazon
I am an affiliate with Amazon. When you shop the links below, I receive a small commission from the affiliate, at no additional cost to you. This helps me balance the costs of the time and love I put into my projects and blog so I can continue to share my ideas with you for FREE. If you shop the links, thank you! I greatly appreciate it.
Below is the product that I used for this project.


I can't wait until my supplies from Scrapbook.com arrive to make this! Thank you so much for sharing how to create this.
ReplyDeleteSo happy that this project inspired you!
Delete