I'm taking flight with this fun hot air balloon project!
Mixed media and other projects on a flat surface are usually in my wheelhouse, but I wanted to create an altered project for this particular theme today for Prima Marketing. And I used the lovely new
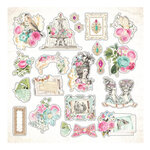
Avec Amour collection for this project because I really love the flowers in this one!
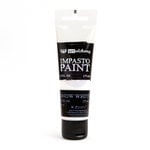
I'll have all the supplies listed and linked down below in case you want to make your own version of this. But let's get straight into the tutorial. Start by painting your mini basket with Finnabair's Art Alchemy Impasto Paint in
Snow White.
While that is drying, assemble your
6 inch white paper lantern. Using hot glue, attach 4
paper straws to your paper lantern so they are angled slightly to fit into the basket easier. I glued these straws just below the middle of the paper lantern, spacing the 4 straws evenly around the lantern, using the vertical ribs that run down the lantern as my guide. Then using hot glue, attach the paper straws to the inside of your mini basket.

Now that the hot air balloon is assembled, it's time to start decorating it. I started first by draping pieces of
1/8 inch ribbon and
strings of pearls around the balloon and basket. on the basket, I sectioned it out by glueing the ends where the paper straws sat, taking all of the ribbons right up to the top edge of the basket. On the balloon, I sectioned it out so the ends were glue to each section of the paper lantern defined by those vertical ribs, gluing them so the ribbon ends were at the middle of the paper lantern (so just above the ends of the straws).
I found it easiest to cut each draped section out then attach each piece individually. This ensures that each draped piece of ribbon is even as you go around the balloon and basket. Each mini basket in the set I purchased was slightly different in size, and you may also glue the paper straws in a slightly different spot, so your measurements for each section might be a little different. But here is my list of measurements:
- Basket Pink Ribbon: 5.24 inches
- Basket White Ribbon: 4.5 inches
- Balloon White Ribbon: 9 inches
- Balloon Pink Ribbon: 6.5 inches
- Balloon Pearl String: 6 inches
Once you have all of those draped ribbons in place, you can cover up your hot glue mess with an
embroidered pearl trim or 1/4 to 1/2 ribbon of your choice. On mine, I placed this trim around the top edge of the basket and around the middle of the lantern. I used hot glue for this as well.
Using hot glue, add a small
satin ribbon bow and an
Endearing Notes flower from the Avec Amour collection to each "junction" of draped ribbons. On mine, the ones on the basket got glued to the paper straws just where they meet the top edge of the basket. On the paper lantern portion, they got glued just below the embroidered pearl trim. This helps to hide the raw ends of the paper straws as well.
On the paper straws, I added a little banner ephemera piece, layering some more ephemera and a flowers on it. If you want a little extra bling, you can add some of the
gems from this collection!
And that' it! It looks complicated, but I did all the figuring out and planning for you, plus once you figure it out or see it broken down like this, you probably have now realized just how simple it truly is. So now you can go and create a bunch of these little balloons for your next party!
Until next time, happy crafting!
Adrienne
Shop the Supplies:
Scrapbook.com
I am an affiliate with Scrapbook.com. When you shop the links below, I receive a small commission from the affiliate, at no additional cost to you. This helps me balance the costs of the time and love I put into my projects and blog so I can continue to share my ideas with you for FREE. If you shop the links, thank you! I greatly appreciate it.
Below are products that I used for this project.
Amazon
I am an affiliate with Amazon. When you shop the links below, I receive a small commission from the affiliate, at no additional cost to you. This helps me balance the costs of the time and love I put into my projects and blog so I can continue to share my ideas with you for FREE. If you shop the links, thank you! I greatly appreciate it.
Below are products that I used for this project.


No comments:
Post a Comment
I'd love to hear your thoughts!