Golden Peach Mixed Media Canvas Layering Tutorial with Reneabouquets
During the late summer, one of the things that I enjoy the most is eating delicious Palisade Peaches.
If you aren’t from Colorado, Palisade Peaches come from the Palisade Valley near Grand Junction Colorado. Colorado’s western slopes are the perfect environment for creating sweet fruits. The hot sun during the day and the cool nights from being a high plains state is what creates the sweet peaches, grapes, cherries, melons and more that this farming area is known for.
Palisade Peach season is nearly upon us here in Colorado and I’m already dreaming of the golden fruit. So much so, that I was inspired by the hues of these fuzzy, scrumptious delights that I wanted to create a mixed media canvas using these golden-coral hues.
While that was drying, I began working on the resin frame I cast from a Finnabair mould. I applied Foundry Wax in Statue using a brush, to make sure that it got in all the nooks and crannies of this frame. I then heated it with my heat tool to let that metallic wax magic happen!
As the frame cooled (the heat softens the resin so let it set back up on a flat surface), I added a bit of copper metallic watercolor paint to my canvas to highlight a bit more of that texture. I painted it on and splattered it for an organic effect. Once the frame was dry, I added just a touch of Old White Wax to the highlights of the frame. I then did the same to the canvas using white impasto paint.
Next I cut my lace to fit the canvas. I used heavy body gel to adhere the frame onto the canvas over the lace. This tacks the lace in place and begins the foundation of my layering process. I then added paper flowers as the base layer of paper flowers. These are a bit more hidden under all the other layers and having a bunch on hand just so you can create these layers is really handy. Be sure to check out my YouTube video tutorial below for exactly how I layer all of these elements and for some of my tips and tricks!
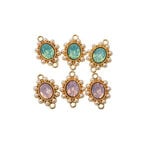
For the finishing sparkly touches, I started by applying a little bit of Glossy Accents to all of the paper flowers. This is a great adhesive for Gawdie Girl Glitter Glass as it dries clear and glossy. I sprinkled on Diamond Shard Glitter Glass and once it had a chance to dry for a bit, I gently tapped the canvas to knock the excess off onto a scrap of paper and then poured that back into my jar. Finally, I added a few jewels from Prima for just a bit more sparkle! I hope that you enjoyed this tutorial and until next time, happy crafting!
*** The Reneabouquets website is currently experiencing technical difficulties with checkout function. While I was able to link to the majority of products in her Etsy shop for you to purchase, a few of the items are not offered on Etsy. Please be patient and check back in to see if you can purchase these items from her website later!
Scrapbook.com
I am an affiliate with Scrapbook.com. When you shop the links below, I receive a small commission from the affiliate, at no additional cost to you. This helps me balance the costs of the time and love I put into my projects and blog so I can continue to share my ideas with you for FREE. If you shop the links, thank you! I greatly appreciate it.
Below are some of the products that I used for this project.


No comments:
Post a Comment
I'd love to hear your thoughts!