What Father's Day card is complete without a good dad joke or pun?
So I thought how fun would it be to have a "Hey Pop" card with popsicles tinted with Pops of Color!? I know, right?! I think my dad would appreciate this level of dad pun.
This card is super easy to create! I started by scraping two colors of Pops of Color onto a piece of solar white cardstock. For one sheet, I did
summer peach and
coral sunset, and for the other I did
sunshine yellow and
key lime. Simply squeeze a line of each color near the edge of the cardstock and then scrape it across the cardstock with a
craft scraper, adding more Pops if needed.
Depending on how thick you add on the Pops, it should dry really quickly. And you want to make sure that this is totally dry before running it through your die cut machine or you'll get paint all over your
cutting pads. So while that was drying, I added a drop water to a small squeeze of each of those Pops colors and then splattered the paint onto a white slimline mat. Set this aside to dry as well.
Once the sheets of ombre Pops are dry, cut out 3 rectangles. I used the Tim Holtz
stacked rectangles for this. I then used a corner rounder to round one set of corners. This might take a little muscle depending on how thick you applied your Pops. You can also just use a good set of
scissors. Set these aside for later.
I needed a popsicle stick for my sweet treats. I used the
Artful Brush die from Spellbinders, cutting it from a brown cardstock from the
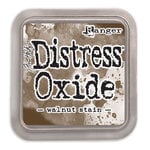
Harvest A2 smooth cardstock pad. This paintbrush die handle is the perfect size and it embosses the cardstock with a pretty woodgrain texture. I then swiped Distress Oxide in
walnut stain directly across these brush handles to highlight that woodgrain. If you get a little heavy handed when swiping your ink pad across, just give it a spritz of water and dab with a soft cloth to lift some of that ink.

Before assembling my card, I wanted to die cut and assemble my sentiment. I chose a yellow cardstock from the
Sherbet A2 pad and a green cardstock from the
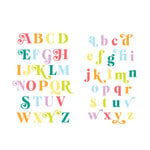
Floral A2 pad for my letters. I cut out Hey Pop using the
Festive alphabet dies from Scrapbook.com. I cut two layers of yellow and one layer of green, creating a yellow drop shadow with the die cuts. I used
Smart Glue to glue all the layers together. (A pair of
fine tipped tweezers comes in handy for lining up your layers just right!)
To assemble, I started by tying a bit of yellow jute twine around the card matte with splatters. I then layered on my popsicles and sentiment using lots of
foam adhesive. The popsicle sticks have one layer of foam and the popsicles have two layers of foam. I varied the heights of my letters too--the H and O have two layers of
foam.
The finishing touch on this card is a layer of yellow drips on the center popsicle. I ended up doing two layers of the big drips and two little raindrops of drips. (Check out my
raindrops umbrella card video for my technique on how to create raindrops with your Pops of Color.) And then I added a few
orange jewels from Pinkfresh that remind me of orange sherbet. And that's it! I think this is the perfect, summery Father's Day card. Until next time, happy crafting!
Adrienne
Shop the Supplies:
ReplicaSurfaces
Love the background I shot my photos on? It's from Replica Surfaces, a company that makes rigid photo-realistic backgrounds. This surface is called Weathered Wood. You can pick up your own with a 15% discount by shopping this link. When you do, I get a small commission from the sale at no extra cost to you, which helps me continue to provide you amazing tutorials and information, just like this blog post!
Scrapbook.com
I am an affiliate with Scrapbook.com. When you shop the links below, I receive a small commission from the affiliate, at no additional cost to you. This helps me balance the costs of the time and love I put into my projects and blog so I can continue to share my ideas with you for FREE. If you shop the links, thank you! I greatly appreciate it.
Below are products that I used or similar products.


No comments:
Post a Comment
I'd love to hear your thoughts!