Spring is only a few days away; and I don’t know about you, but I can’t wait!
I’ve been in the process of trying to use up some old collections to free up some space in my craft room and I find that one of the best ways to do that is to combine old collections with a few newer elements.
One of the collections I’m using up currently is one of my all time favorites from Prima, their
Watercolor Floral collection. I’ve done some other mixed media projects with this collection as well as a few scrapbook layouts. But so far they have all been purple or pink so I wanted to make a green/mint project.
Luckily there are still many elements of this collection available for purchase so if you want to replicate this, you can buy everything I used except for one set of flowers. I have everything linked below for you!
I started out by applying some Tim Holtz
opaque grit paste through the Scrapbook.com
botanical sprigs stencil. I only covered half of my 8x8 inch canvas. For the other half, I chose a piece of green patterned paper from the 12x12 Watercolor Floral
paper pad, ripping it to create torn edges.
Once the grit paste was dry, I mixed a little
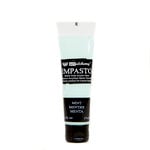
mint Impasto Paint with some water and applied it to the canvas, letting the color stick in all that texture from the stencil and grit paste. Next I applied the torn paper using Finnabair’s
gliding glue, smoothing it to the surface of the canvas with a brayer. To help smooth the paper down with the
brayer, I place something under my canvas to provide a firm surface to use the brayer on.
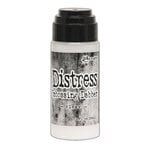
While that was drying, I painted a Creative Embellishments chipboard doily frame with Distress Paint in
salvaged patina. Use only a thin layer of paint so your chipboard doesn’t warp and so that it dries quickly. Once dry, use the
embossing dabber to apply embossing ink to the chipboard frame. To create a something deeper in color like I have, use the matching
salvaged patina Embossing Glaze. If you want something a little lighter in color, use a clear embossing powder. Heat set your glaze—I did two layers for a gorgeous shiny look.
To make it look even more like patina, I added gliding glue to the frame. Once tacky, I applied
copper gilding flakes and rubbed off the excess. For even more texture and color, I dry brushed some of the mint impasto paint over the frame. This creates a truly worn and distressed patina look! I then glued this chipboard frame down onto the canvas with the gliding glue.
I chose a
floral chipboard piece from Prima and painted it with the mint Impasto Paint. Again, keep your paint light so that you don’t warp your chipboard badly. While that was drying, I worked on fussy cutting out some leaves from one of the papers from the Watercolor Floral collection. I always use a swivel craft knife, self healing mat and
small scissors for this.
Once all my elements were dry or cut out, I began assembling the
paper flowers and fussy cut ephemera onto the canvas.
Heavy body gel is my favorite for this as it really holds those paper flowers in place. Before adding on the charm from the new Indigo collection, I splattered the canvas with a little bit of
iridescent watercolor.
I topped off the larger cluster of flowers with the Indigo
flower charm, adhering it with heavy body gel. I then used Glossy Accents to apply
iridescent sequins to the flowers and canvas. To finish it all off, I added a few
gems from the Watercolor Floral collection. And that’s it! I hoped you enjoyed this walkthrough tutorial. Until next time, happy crafting!
Adrienne
Shop the Supplies:
ReplicaSurfaces
Love the background I shot my photos on? It's from Replica Surfaces, a company that makes rigid photo-realistic backgrounds. This surface is called Seafoam. You can pick up your own with a 15% discount by shopping this link. When you do, I get a small commission from the sale at no extra cost to you, which helps me continue to provide you amazing tutorials and information, just like this blog post!
Scrapbook.com
I am an affiliate with Scrapbook.com. When you shop the links below, I receive a small commission from the affiliate, at no additional cost to you. This helps me balance the costs of the time and love I put into my projects and blog so I can continue to share my ideas with you for FREE. If you shop the links, thank you! I greatly appreciate it.
Below are products that I used in this project


No comments:
Post a Comment
I'd love to hear your thoughts!