I love when I get to create for other people--it is truly one of the most satisfying things to bring pictures to life.
I recently created 4 pages and did an album cover alteration for a lovely couple who eloped on Halloween. In this blog post, I just wanted to share the photos I took of everything before sending the album off to them and some details about how I created the pages.
For this first page (above), I took the ribbon from their hand fasting ceremony and tied it into a bow. I then looped it to double it over and then twisted it once in the center to make the infinity symbol. I used
1/4" adhesive to attach it to the page.
I then took the face masks they wore during the ceremony and traced a heart shape with some chalk and then cut the hearts out. To keep the fabric from fraying, I hand sewed the edges under with some black thread. To attach the masks to the page, I sewed little X stitches in three spots on each mask to firmly attach it to the paper.
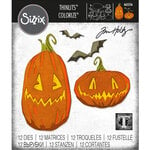
I then matted the photos to black cardstock and popped them up with foam adhesive. To add a little more Halloween flair to the page, I cut three bats from the
Pumpkin Patch Colorize die with kraftstock and then added some black gems to the centers.
I took some of the dried petals and placed them into a simple shaker element that I created using cardstock,
acetate and
foam adhesive. I tied the black satin ribbon from the bouquet into a bow. I then attached everything to the pages using foam adhesive, roller adhesive and
collage matte medium. For the ribbon, I sewed through the back of the knot through the paper to attach it. I added a few red rose buds using
heavy body gel as well.
The shaker element this time held some of the confetti from the end of the ceremony. I added a few
Pinkfresh clear crystals into the mix just for a bit of special sparkle. Again, I attached everything here with thread, heavy body gel,
foam adhesive and roller adhesive.
For the final page, I gave a big dose of red by using some Bazzill cardstock as the background paper. I incorporated some of the tone on tone black swirl patterned paper and mounted the photos on black cardstock.
I glued all the elements down with glue roller, 1/4" adhesive, foam adhesive and heavy body gel. I added a few red pearls to finish it all off.
And finally, I want to share the album cover alteration. I purchased
some lace from Etsy for this. It had some stretch so I stretched it around the
12x12 white album from Scrapbook.com, measured and cut the lace. I then hand stitched the lace into a loop of fabric that could then stretch around the front cover (see photo below for the stitching placed to the inside of the album cover).
To keep the lace from sliding around, I created a name plaque for the couple, using 6 layers of cardstock, matted to create three layers. I then foiled
sheets of toner ink in rose gold foil, placed a
double-sided adhesive sheet on the back, and cut
the letters out for their names. I peeled the backing off the letters and pressed them down onto the plaque base.
To glue the plaque down, I used a thin layer of soft gloss gel (but any thin liquid adhesive would work, like the Scrapbook.com
Smart Glue--just brush it on in a thin layer). I used something heavy to press the plaque down firmly in place for about a half hour, then took the heavy items off to let the glue fully cure. I added a couple of white roses and some gems using heavy body gel and collage medium respectively to adhere them with.
I'm happy to say that the couple loved their album and pages and I hope you do too! Until next time, happy crafting!
Adrienne
Shop the Supplies:
ReplicaSurfaces
Love the background I shot my photos on? It's from Replica Surfaces, a company that makes rigid photo-realistic backgrounds. This surface is called Shiplap. You can pick up your own with a 15% discount by shopping this link. When you do, I get a small commission from the sale at no extra cost to you, which helps me continue to provide you amazing tutorials and information, just like this blog post!
Scrapbook.com
I am an affiliate with Scrapbook.com. When you shop the links below, I receive a small commission from the affiliate, at no additional cost to you. This helps me balance the costs of the time and love I put into my projects and blog so I can continue to share my ideas with you for FREE. If you shop the links, thank you! I greatly appreciate it.
Below are products that I used or similar products.


No comments:
Post a Comment
I'd love to hear your thoughts!