As a gardener and a lover of Halloween, nothing quite sums up my obsession like a deadly floral "book" vignette.
I'm back in the Halloween realm with today's blog post! I'll also be sharing my tutorial on how you can use the ends of tiny lights that you cut off. I know, you can throw them out, but as someone who tries to be more cognizant of what I consume, I also want to use up what I have.
This little faux book, titled
Moste Deadly Flora, combines my love of flowers and Halloween in a very chic and elegant way. I began by painting a
Tim Holtz vignette box with a
linen colored impasto paint on the back and three of the sides. Impasto paint is thicker so it gives you an opportunity to create texture similar to stacked book pages. On that fourth side of the box, I used black gesso. This side would become the "binding."

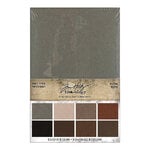
Once the paint was dry, I used Distress Ink in Hickory Smoke and gently rubbed the pad against the grain of the linen painted sides. This gives an aged look to the faux book and highlights the texture. I then measured the box and cut a
floral patterned Backdrop. In the photo above you can see that I have it wrapping around the edge of box on the bottom and that it is cut slightly larger than the box so that it looks like the edge of a book cover. I also made the "biding" taller than the box so that when I scored and folded it, I created a rounded spine. I also rolled the spine around my Distress Spray Bottle to help get it to round out nicely.
I used Distress Collage Medium to adhere the book cover to the box, using my
craft scraper to firmly press the paper onto the backside (or in this case, the top) of the box. I set this aside to dry, setting a few heavy items on top of it for about 5 minutes to make sure the paper was firmly pressed to the box.
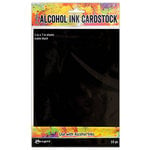
As that dried, I painted some
Ranger matte black cardstock with the
Candlelight Mica Spray. I also set this aside to dry. I cut a few small strips and then added some double sided adhesive to the rest of it. I cut out the words Flora using the
Tiny Type Upper. I used collage medium to adhere the strips and peeled off the backing on the letters and stuck them on. Next I used more matte black cardstock and wrote out Moste Deadly with a
fine point metallic gold marker. I cut this into a banner and used some double sided adhesive to add it to the binding.

I then pulled out the
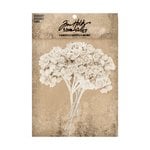
skull I bought a while back from Relics and Artifacts. I watered down some black gesso and painted it over the skull, wiping off the excess with a soft cloth. I made sure that the black gesso was able to pool in the nooks and crannies of this resin piece. I then painted the eye and nose sockets with black gesso and set it aside to dry. I also took a couple of the white
Bouquet flowers and colored them with Distress Mica Spray in Empty Tomb and let these dry as well.
Once the gesso in the skull was dry, I filled the eye and nose sockets with Glossy Accents and then sprinkled it with
Nightfall glitter. I also added Glossy Accents and glitter to the flowers, setting these aside to "cure."
I then pulled out a few
bottles and ephemera that would also sit on top of the book with the skull and flowers. I added ink to the edges of the ephemera to distress them and filled the bottles with little
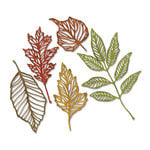
crystals or iridescent shreds of cellophane. I also cut some
Skeleton Leaves out of a black kraft stock and used some shaping tools to give them more dimension.
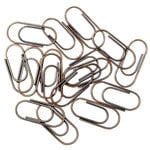
Once everything was dry, I could begin to assemble the pieces on top of the box, I started by figuring out where the
laboratory bottle with go and where I would need to drill a hole to pass the
tiny lights through. I used my Dremel tool to create the hole. Now begins my part of the tutorial on how to use the ends of tiny lights that you cut off from the battery pack!
I cut off a section of 4 lights, making sure that I left one end with as much wire as possible. This is the end we'll be jerry rigging to a battery (I used a CR2032). But in order to make a connection to the battery, we first need to sand the wires a little. There is a protective coating over the wires. If you've ever pinched the ends of this wire around a battery before and nothing happened, this coating is why. Take some fine grit sand paper and wrap it around each wire and sand it down a bit.

To make sure that you took off enough of the coating, pinch each wire to one side of the battery using your fingers. You might have to test by switching which wire is on which side of the battery as there is a positive and negative side of the battery. If you got the right sides lined up and enough of the coating off, the lights should turn on when you press the wires to the battery. If you are using more than half of the lights, you might need to pinch the wires over two batteries--remember to have the positive sides of the batteries facing in the same direction as these lights work off of a loop current configuration, rather than a parallel current configuration.

To keep the lights turned on without pressing the wires to the battery, we'll place a little bit of washi tape around the wires and battery just to protect the wires and hold them in place for the next step. To make sure the wires don't wiggle loose, use a binder clip to pinch the wires tight against the battery. The washi tape will serve as a cushion against the binder clip and help you get the binder clip on with more ease. Once this is rigged up, you can feed the other end of your lights through the hole and pop them into the beaker, and lightly closing the cork over it. I didn't glue my cork in just in case I ever need to replace these lights.
To hide the wiring on the back of the bottle, I tied some
mummy cloth around the neck of the beaker and let the ends hang over the wire. To fancy it up a bit, I wrapped some silver thread and a Halloween story stick over the mummy cloth.
Once this was assembled and jewels were added to the smaller corked vial, I was ready to start gluing things down to the top of the faux book. I used a variety of adhesives, including heavy body gel, Glossy Accents and Distress Collage Medium to glue the elements down.
As a finishing touch, I inked the back of a Reneabouquets Butterfly Kisses tiny butterfly with Black Soot Distress Ink and hit it with a quick shot of my heat tool to set the ink. I then bent the wings and used a drop of Glossy Accents to adhere it to the top of the skull. Once the glue was dry, I added a little
pink gem to the center of the butterfly!
I hope you enjoyed this tutorial, including how to use cut off tiny lights! If you have any questions about how to get your tiny lights to work, drop a comment below. Until next time, happy crafting!
Adrienne
Shop the Supplies:
ReplicaSurfaces
Love the backgrounds I shot my photos on? They're from Replica Surfaces, a company that makes rigid photo-realistic backgrounds. This surfaces are called Weathered Wood and Special Addition Gloss Black. You can pick up your own with a 15% discount by shopping this link. When you do, I get a small commission from the sale at no extra cost to you, which helps me continue to provide you amazing tutorials and information, just like this blog post!
Reneabouquets
Butterfly Kisses Aurora Borealis Pink Single Sided Printed Butterflies
Scrapbook.com
I am an affiliate with Scrapbook.com. When you shop the links below, I receive a small commission from the affiliate, at no additional cost to you. This helps me balance the costs of the time and love I put into my projects and blog so I can continue to share my ideas with you for FREE. If you shop the links, thank you! I greatly appreciate it.
Below are some of the products that I used. For the full list, visit this link.


No comments:
Post a Comment
I'd love to hear your thoughts!