This month's inspiration and color palette from Scrapbook.com was full of fun, summery colors and elements.
I was inspired by the bins of yummy gelato in the mood board as well as the gold. So I combined all those colors and hints of gold into a fun little mixed media project with some mini ice cream cone gelato ATCs.
I started by cutting out some ice cream cones from white textured cardstock using my Silhouette Cameo. I created a few layers, including the cone, the sweet gelato filling and a cute cherry on top.
Then I used my
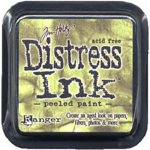
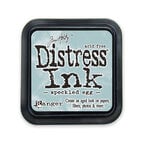
Tim Holtz blending brushes to add color to each of the layers. I spritzed with my Distress sprayer and dabbed with a lint free cloth then dried between each layer of ink. When I was satisfied with how each piece looked, I used some
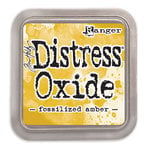
Distress Oxide and a water brush pen to add the criss-cross lines on the cones.
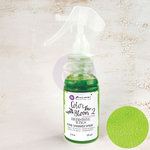
Then I sprayed some color mists onto a few white flowers to match my little cones of gelato. I love using my
Tim Holtz splat box for this as it really contains the mess. I put a little piece of paper towel under the flowers to help mop up any access liquid. I started the drying process of these flowers with my
Ranger Heat It tool then set them aside to finish drying while working on the next part.
I assembled inked gelato die cuts using
foam adhesive to pop the gelato layer and cherry up from the ice cream cone base. I then watered down 3 coordinating
Pops of Color to splatter consistency in a paint palette and tapped a paintbrush full of pearlescent color over each of the assembled pieces. I set these aside to dry.
Next I used some cardstock from the
A2 Sherbet pad to cut a sentiment and a little piece that reminds me of melted chocolate textured with bubble wrap, like on those fancy cakes and cupcakes where they press the bubble wrap onto a thin layer of melted chocolate or candy melt, let it harden and peel the bubble wrap up for a chocolate decoration that looks like honeycomb? That's what I was going for here! I then spritzed a bit of color mist onto each of the die cut
sentiments and allowed these to dry.
Once all my pieces were fully dry, I placed my little chocolate decoration die cut where I wanted, then added a dab of heavy body gel to the back of the flower and pressed it on top of the bubble die cut. Then I applied
Smart Glue randomly over my project so I could add a little gold foil detail--this glue stays tacky after it dries so it's perfect for adding foil.
I waited for the glue to turn dry (you'll know because it turns clear) and then applied some
gold foil flakes to the areas with adhesive and burnished the excess off with a soft brush. (Pro Tip: Practice using Smart Glue on scrap paper so you get used to how much you need to squeeze the bottle for the amount of glue you want--this will keep you from glopping too much glue on your project!)
To finish it all off, I added the sentiment to each gelato as well as some
coordinating jewels from Pinkfresh using the Smart Glue. I think these turned out so cute! And now I'm hungry for some gelato! Excuse me while I go raid my freezer now!
Shop the Supplies:
ReplicaSurfaces
Love the background I shot my photos on? It's from Replica Surfaces, a company that makes rigid photo-realistic backgrounds. This surface is called Shiplap and it's one of my favorite backgrounds. You can pick up your own with a 15% discount by shopping this link. When you do, I get a small commission from the sale at no extra cost to you, which helps me continue to provide you amazing tutorials and information, just like this blog post!
Scrapbook.com
I am an affiliate with Scrapbook.com. When you shop the links below, I receive a small commission from the affiliate, at no additional cost to you. This helps me balance the costs of the time and love I put into my projects and blog so I can continue to share my ideas with you for FREE. If you shop the links, thank you! I greatly appreciate it.
Below are products that I used or similar products.


No comments:
Post a Comment
I'd love to hear your thoughts!