I know that using nothing but patterned paper can be intimidating for some when it comes to layouts, but it really doesn't have to be.
My biggest recommendation when using patterned paper for your background and your layers is to keep things simple. Normally I love adding all kinds of embellishments to my layouts, but adding tons of embellishments on top of a patterned paper can be really overwhelming.
I also recommend using papers from the same collection. You don't have to, but it certainly makes life easier when trying to choose coordinating papers! This particular layout features a sweet selfie of my niece and I back when she was still a tiny little munchkin! I can't believe she is going to be 2 years old soon! Her head is full of curls and she is so lively and spunky!
My niece is my little bestie and I've been working on creating an album for her. I told my sister she might have to fight me for this layout because I love it and the photo so much!
But I decided to buy additional papers and make a duplicate so we can both have a copy!
(That was the excuse I gave myself to throw a few more things in my cart at Scrapbook.com! 😅
Totally relatable, right?)
I started by choosing two papers from Carta Bella's
Home Again collection. The cream and leaf one became the base of the project and the black and white flowers one I cut down for matting the photo with. I also distressed the edges of the black and white paper to add just a bit of texture.
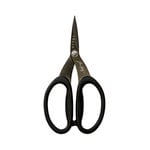
Next I began adding the embellishments. I started by cutting the quote from the coordinating border strips. I used my Tim Holtz scissors to cut it into pieces so I could stagger it going down the page instead of having it as one long strip all the way across. I used a combination of 1/4" double-sided adhesive and
foam adhesive to alternate having some popped up off the page.
Then I added one of the wreath Carta Bella
cardstock stickers to the upper right corner, using foam adhesive to pop it up from the page. I also added one of the cute tiny butterfly cardstock stickers using a foam square to pop it up from the wreath.
Then I added a fresh cut flowers cardstock sticker below the last line of the quote on the corner of the photo, using foam adhesive to pop it up as well. Then I added to pretty
Prima Marketing flowers in a gorgeous sage green, using
heavy body gel to adhere them.
Then I used a small dot of Glossy Accents to adhere a few
Pinkfresh Studio crystals near the paper flowers and the wreath sticker.
Before you flutter off (see what I did there?!), don't forget to
follow me on Instagram! I have so many more great projects coming your way this month, including a second Reneabouquets Guest Design! I am so excited to share all of of my upcoming projects with you, but especially the guest design! I think it might be my favorite project ever! (I know I say that after nearly every project I make, but I really mean it with this one--trust me, you'll fall head over heels for it too!)
Shop the Supplies:
ReplicaSurfaces
Love the background I shot my photos on? It's from Replica Surfaces and it's called Shiplap. You can pick up your own with a 15% discount by shopping this link. When you do, I also get a small commission from the sale, which helps me continue to provide you amazing tutorials and information, just like this blog post!
Reneabouquets
Mint Chocolate Chip Premium Glitter Glass Butterflies
Scrapbook.com
I am an affiliate with Scrapbook.com. When you shop the links below, I receive a small commission from the affiliate, at no additional cost to you. This helps me balance the costs of the time and love I put into my projects and blog so I can continue to share my ideas with you for FREE. If you shop the links, thank you! I greatly appreciate it.
Below are products that I used.


No comments:
Post a Comment
I'd love to hear your thoughts!